In EDUvision Season 3 Episode 9, we demonstrate a project that utilizes simple materials such as pushbuttons and cardboard to create DIY game controllers!
Materials needed
- 4x Push buttons
- Cardboard
- Foam (optional)
- Jumper wires
- ATmega32u4 or SAMD micro based Arduino boards (Leonardo, Esplora, Zero, Due and MKR Family)
Mouse and keyboard emulation
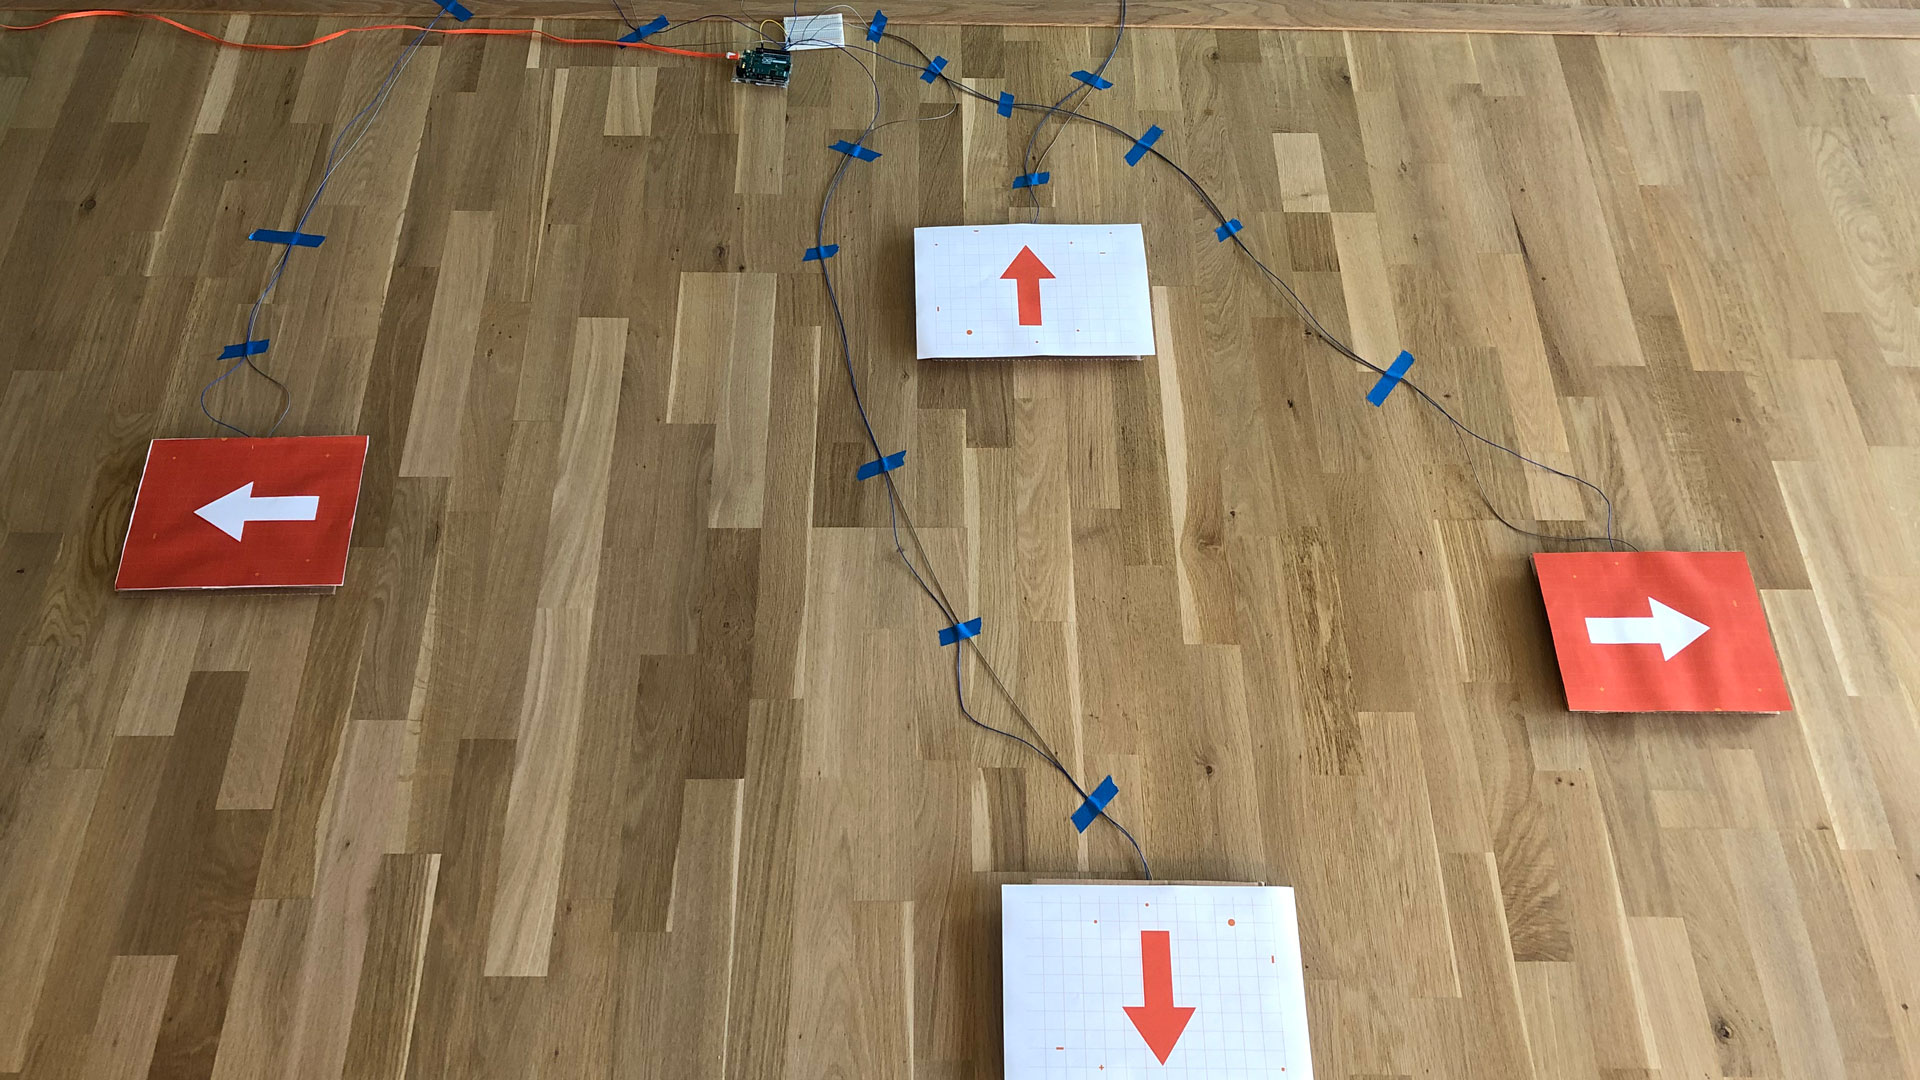
In this project, we use an Arduino Leonardo to take control of the keyboard on the computer. This project requires specific Arduino boards that support this emulation. When a button is pressed, a keypress corresponding to the letter associated with the button will be sent to the computer. We used cardboard to build pads that can be stepped on to use as a controller for a web-based snake game. However, you can design controllers that suit the game of your choice!
Circuit
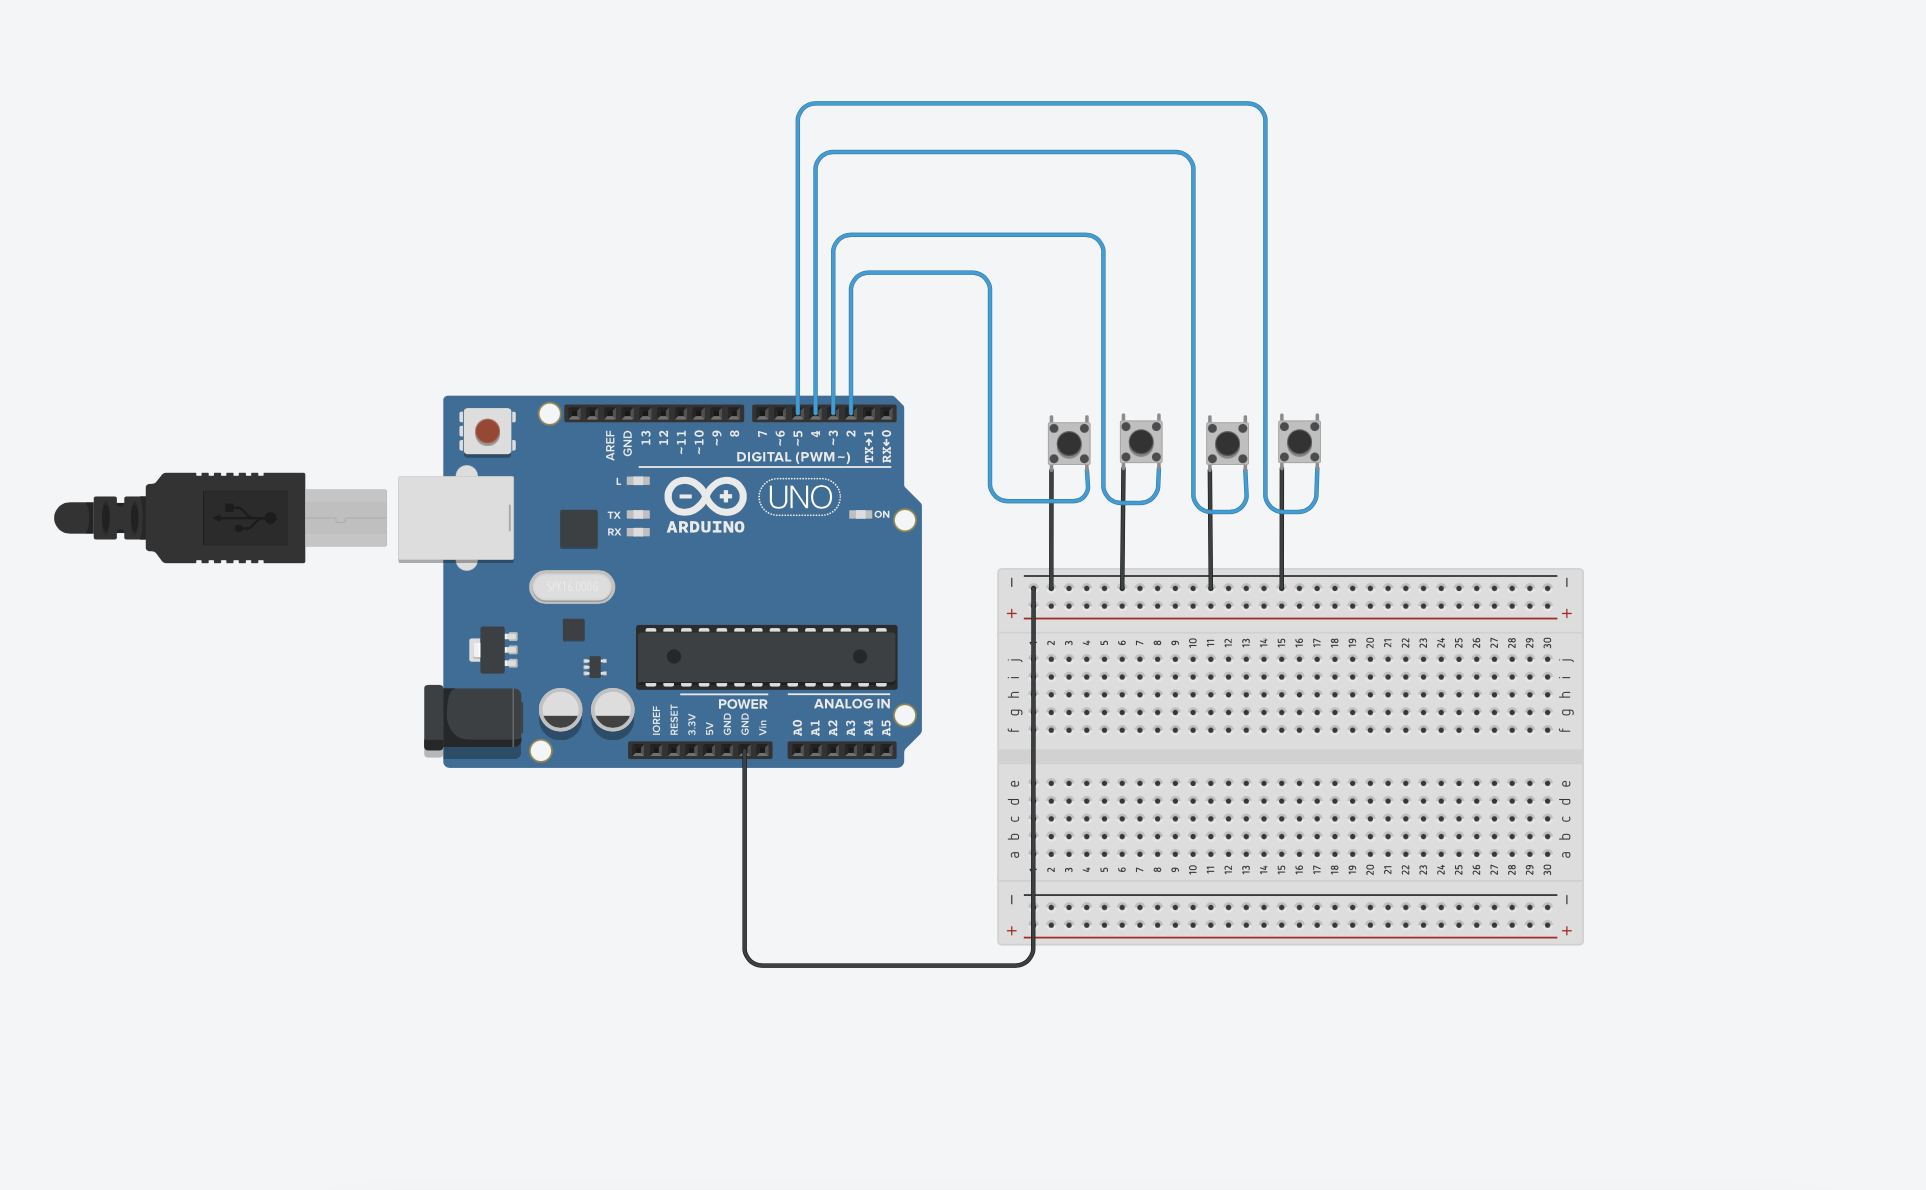 (The wiring diagram illustrates the Arduino UNO board which is not compatible with this project.)
Code
In the code, we are using the digital input pullup resistor which eliminates the need of resistors connected to the push buttons. An internal 20K-ohm resistor is pulled to 5V. This configuration causes the input to read HIGH when the switch is open, and LOW when it is closed. To know which keys we want to use, we use ASCII. The code is using the popular WASD configuration. These keys are used consistently to control the player character’s movement in games. W and S control forward and backward, while A and D control left and right.
Arduino Sketch
#include <Keyboard.h>
// Emulating keyboard or mouse functions only work on 32u4 or SAMD micro-based boards.
void setup() {
  //Start serial connection
  Serial.begin(9600);
  //Configure pins as an input and enable the internal pull-up resistor,
  pinMode(2, INPUT_PULLUP);
  pinMode(3, INPUT_PULLUP);
  pinMode(4, INPUT_PULLUP);
  pinMode(5, INPUT_PULLUP);
  Keyboard.begin();
}
void loop() {
//If corresponding button is pressed
  if (digitalRead(2) == LOW) {
    //Send an ASCII 'W',
    Keyboard.write(87);
    Serial.println(“W was pushed”);
  }
 if (digitalRead(3) == LOW) {
    //Send an ASCII 'A'
    Keyboard.write(65);
    Serial.println(“A was pushed”);
  }

 if (digitalRead(4) == LOW) {
    //Send an ASCII 'S',
    Keyboard.write(83);
    Serial.println(“S was pushed”);
  }

 if (digitalRead(5) == LOW) {
    //Send an ASCII 'D',
    Keyboard.write(68);
    Serial.println(“D was pushed”);
  }
 else {
    Keyboard.releaseAll();
}
}
Test your project
Before building the actual controller you should confirm that your connections are working. Start by opening the serial monitor and press one button at a time. You should get a serial print when a button is pressed. After confirming that your connections are working, try using the buttons in the game of your choice and start creating the final design of your DIY game controller!
Other useful tutorials
Can’t get enough of Arduino keyboard and mouse control? Check out these other tutorials: