Interactive Art Project
In EDUvision Season 3 Episode 01 we demoed a project that utilizes an Arduino UNO R3 and an ultrasonic sensor. We use the data from the ultrasonic sensor to control the graphical elements we see on the screen. The graphics are created with a program called Processing. You can use Arduino serial data and send it to Processing using a serial library (in Processing). This allows you to use the data from all sorts of sensors coupled with graphics, such as in this example!
Materials needed
- Ultrasonic sensor
- Arduino UNO R3 board
- Breadboard
- Jumper wires
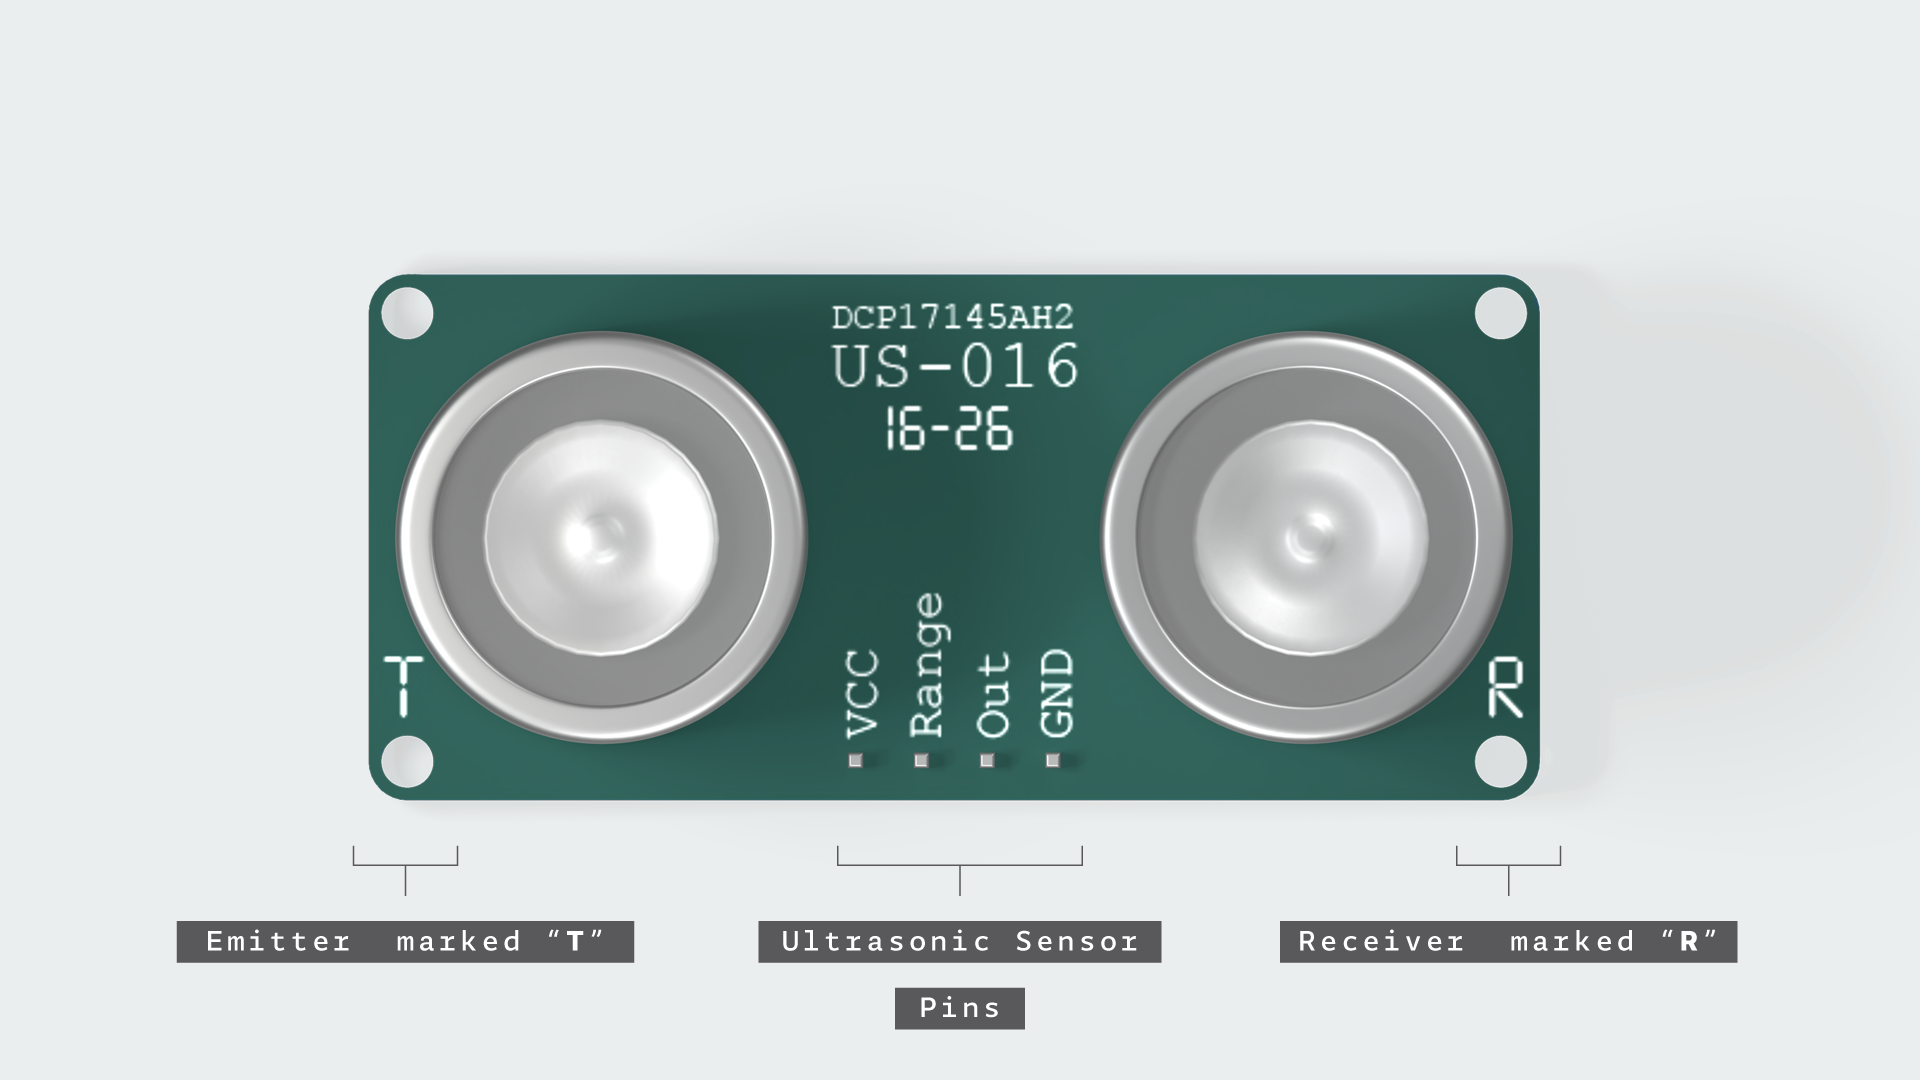
Ultrasonic sensor
The ultrasonic sensor uses the same system that bats use to orient themselves. They send an ultrasonic sound and keep listening until the sound comes back. In this manner, they can detect their distance from the object.
Pins:
- VCC: With this pin we will power the sensor.
- Range: This pin allows us to select the distance and precision of the sensor.
- Out: Through this pin, the sensor will show us, with a voltage variation, the measure taken.
- GND: This is the ground pin of the sensor.
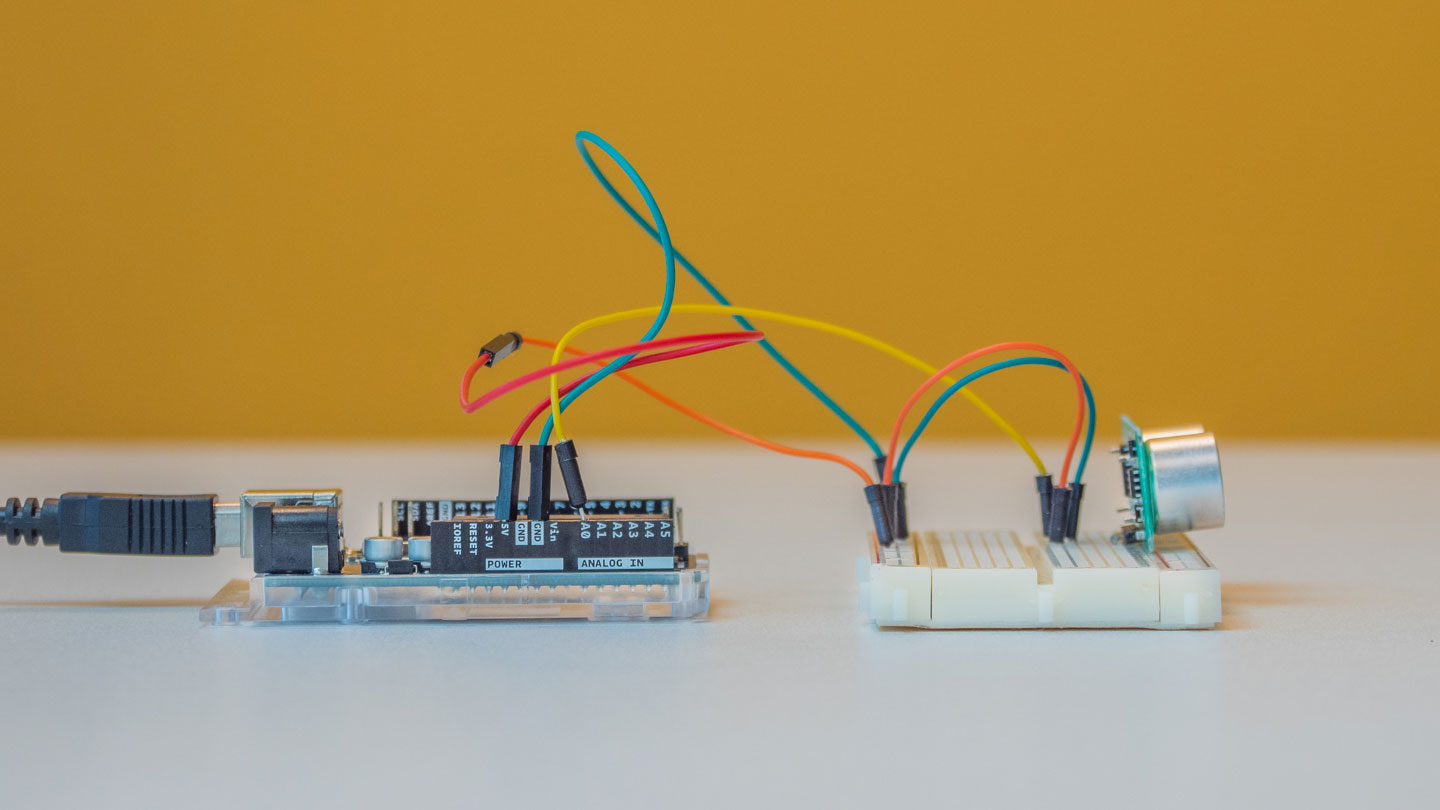
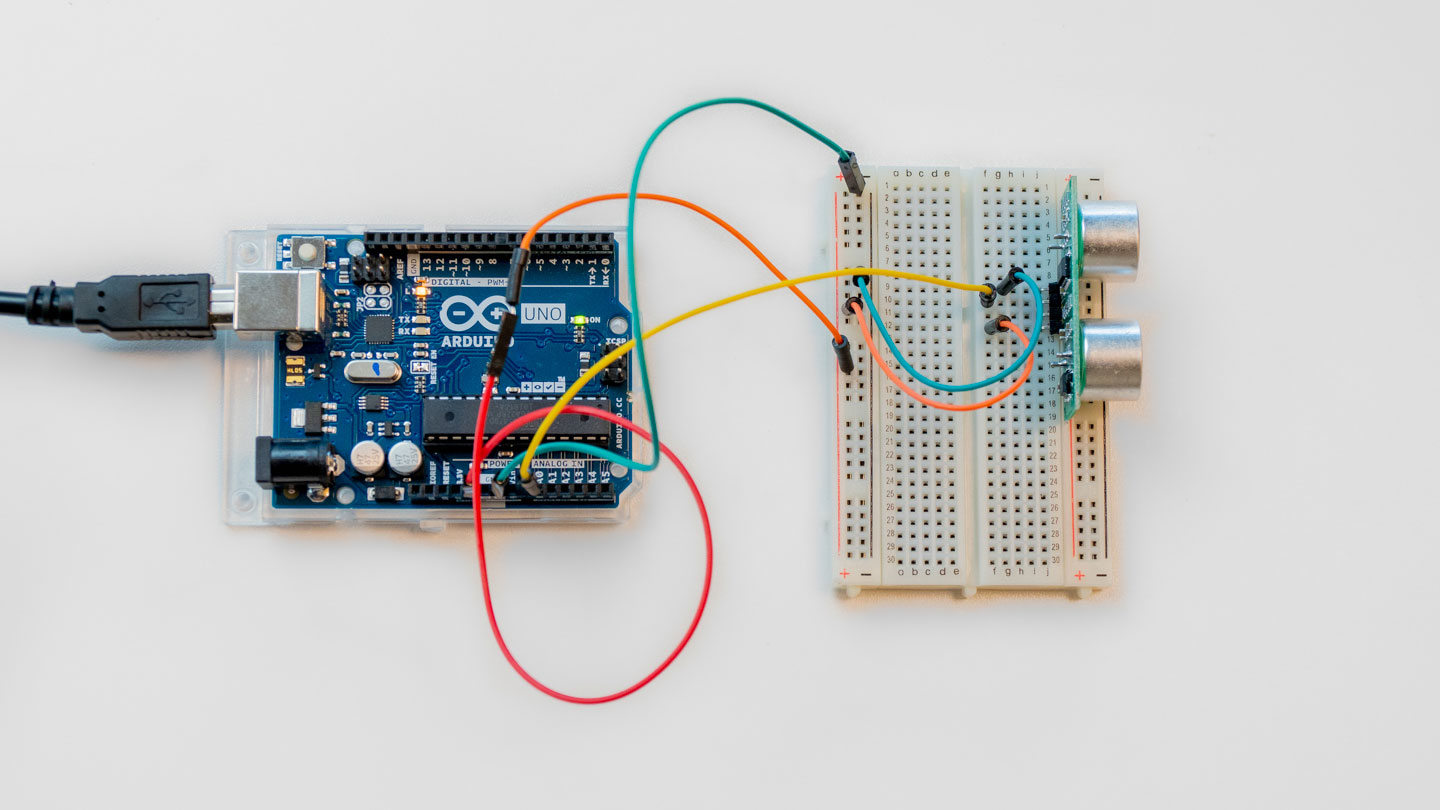
Wiring
Connect the GND pin from the ultrasonic sensor to the GND pin on the Arduino board. VCC pin on ultrasonic sensor to 5V on the Arduino board and Out pin on the ultrasonic sensor to any analog pin on the Arduino board.
Code
Arduino Sketch
Add this short code to your Arduino IDE.
unsigned int ADCValue;
void setup(){
    Serial.begin(9600);
}

void loop(){

 int val = analogRead(0);
   // ADCValue *=3;
   val = map(val, 0, 300, 0, 255);
    Serial.println(val);
delay(50);
}
Connect the Arduino board to the computer using a USB cable and upload the code to your board. Make sure that the serial monitor is printing the values from the ultrasonic sensor. After that you can move on to Processing to create the interactive art.
Processing
In this project we are going to control a Processing sketch with the Arduino via serial communication. Processing is free, open source software based on Java. It was designed for the visual arts community for creating drawings, animations, and interactive programs. Download the latest version of Processing from Processing.org. Select the right file according to your operating system. Processing is available for Linux, MacOS X, and Windows. Extract all the files and click the Processing icon inside the folder to open it.
The Processing IDE interface is very simple. The play icon in the toolbar allows you to compile and run the program and the stop icon will stop the program. In the bottom of the IDE there is a message area that, when you compile your program, gives you information about errors if any.
Example sketch
Program used as an inspiration for this project: Geometric Spiraling Points by Austin McCasland
Copy the code below to your Processing IDE.
import processing.serial.*;

Serial myPort;  // Create object from Serial class
static String val;    // Data received from the serial port
int sensorVal = 0;
float a;
float circleWidth;
float circleHeight;
float speed;
float distance;
int dotCount;
float[][] coordinates;
float[] angle;
float[][] lineColor;

void setup()
{
   size(800,800);
  circleWidth = 8;
  circleHeight =circleWidth;
  distance = circleWidth +=1;
  dotCount = floor((height/2)/distance);
  speed = 1.5/height;

  coordinates = new float[2][dotCount];
  angle = new float[dotCount];
  lineColor = new float[3][dotCount];

  stroke(255);
  String portName = Serial.list()[1]; // Change the number (in this case 1) to match the corresponding port number connected to your Arduino.

  myPort = new Serial(this, portName, 9600);
}

void draw()
{
  if ( myPort.available() > 0) {  // If data is available,
  val = myPort.readStringUntil('\n');
  try {
   sensorVal = Integer.valueOf(val.trim());
  }
  catch(Exception e) {
  ;
  }
  println(sensorVal); // read it and store it in vals!
  }

  speed = (sensorVal*.00001);

  background(0);
  for (int i =0; i<dotCount; i++) {

    angle[i] += (dotCount-i)*speed;   //calculate the new angle for a given circle
    coordinates[0][i]=width/2+(distance*i)*cos(angle[i]); //calculate the x coordinate for a circle
    coordinates[1][i]=height/2+(distance*i)*sin(angle[i]); //calculate the y coordinate for a circle

     //this stuff changes colors
    lineColor[0][i] = 100;
    lineColor[1][i] = 50+i*2;
    lineColor[2][i] = 100+i*4;

    //draw our lines
    if(i>1) {
      pushStyle();
      strokeWeight(floor(sensorVal*.033));
      stroke(lineColor[0][i], lineColor[1][i], lineColor[2][i], 100);
      line(coordinates[0][i-1], coordinates[1][i-1], coordinates[0][i], coordinates[1][i]);
      popStyle();
    }

  }
}
Serial library Import processing.serial.*; This library allows us to use the data from the sensors through serial communication.
Try catch statement We use the try and catch statements to prevent errors that might stop the program from running. Read more about Java Exceptions from w3schools website.
Test your project
Run the program in Processing. Move your hand or, for example, a notebook in front of the ultrasonic sensor. You should now see different shapes on your computer's screen based on how far or close your hands are. When you move your hand closer to the sensor, the animation gets slower and the lines get thinner and vice versa.

Other useful tutorials
Starter Kit tutorial: Tweak the logo. Watch the tutorial video for Starter Kit project 14 to tweak the color of the Arduino logo using Processing.
Project Hub: Ultrasonic Range Detector Using Arduino and SR-04F Make a Ultrasonic Range Detector Using Arduino and SR-04F to measure any distance without using rulers with this simple tutorial.
Processing Tutorials Explore the tutorials on the Processing site to create more digital art using different colors, shapes and images.