Keyboard Message
When the button is pressed in this example, a text string is sent to the computer as keyboard input. The string reports the number of times the button has been pressed. Once you have the Leonardo programmed and wired up, open up your favourite text editor to see the results.
NB: When you use the Keyboard.print() command, the Arduino takes over your computer's keyboard! To insure you don't lose control of your computer while running a sketch with this function, make sure to set up a reliable control system before you call Keyboard.print(). This sketch includes a pushbutton to toggle the keyboard, so that it only runs after the button is pressed.
Hardware Required
Arduino Leonardo, Micro, or Due board
momentary pushbutton
10k ohm resistor
Software Required
- Any text editor
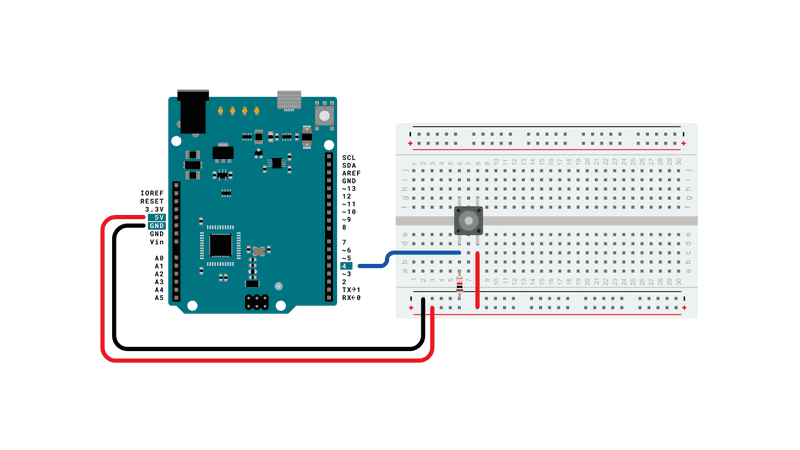
Circuit
Attach one pin of the pushbutton to pin 4 on the Arduino. Attach the other pin to 5V. Use the resistor as a pull-down, providing a reference to ground, by attaching it from pin 4 to ground.
Once you've programmed your board, unplug the USB cable, open a text editor and put the text cursor at in the typing area. Connect the board to your computer through USB again and press the button to write in the document.
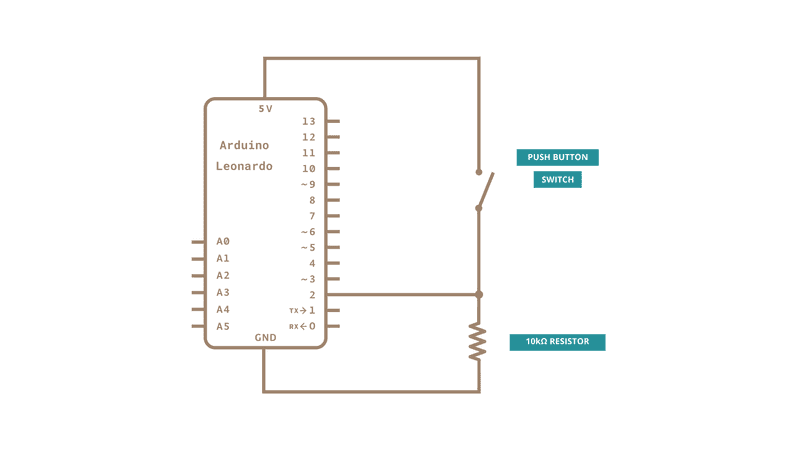
Schematic
Code
See Also
KeyboardLogout - Logs out the current user with key commands.
KeyboardReprogram - Opens a new window in the Arduino IDE and reprograms the Leonardo with a simple blink program.
KeyboardSerial - Reads a byte from the serial port, and sends back a keystroke.
KeyboardAndMouseControl - Demonstrates the Mouse and Keyboard commands in one program.
ButtonMouseControl - Control cursor movement with 5 pushbuttons.
JoystickMouseControl - Controls a computer's cursor movement with a Joystick when a button is pressed.
Last revision 2015/07/29 by SM