Chat Server
A simple server that distributes any incoming messages to all connected clients. To use, open a terminal window, Telnet to your devices IP address, and type away. Any incoming text will be sent to all connected clients (including the one typing). Additionally, you will be able to see the client's input in your serial monitor as well.
Hardware Required
Arduino Board
Circuit
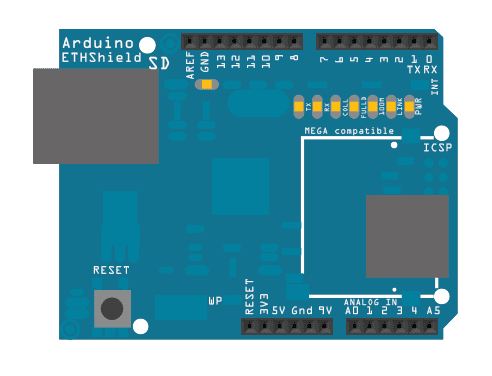
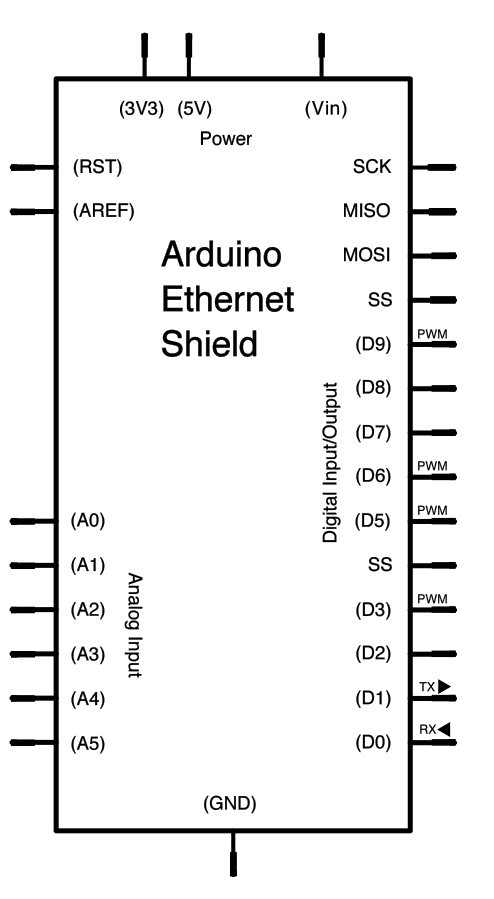
The Ethernet shield allows you to connect a WizNet Ethernet controller to the Arduino boards via the SPI bus. It uses pins 10, 11, 12, and 13 for the SPI connection to the WizNet. Later models of the Ethernet shield also have an SD Card on board. Digital pin 4 is used to control the slave select pin on the SD card.
The shield should be connected to a network with an ethernet cable. You will need to change the network settings in the program to correspond to your network.

image developed using Fritzing. For more circuit examples, see the Fritzing project page
In the above image, the Arduino board would be stacked below the Ethernet shield.
Schematic

Code:
/*

 Chat Server

 A simple server that distributes any incoming messages to all

 connected clients.  To use, telnet to your device's IP address and type.

 You can see the client's input in the serial monitor as well.

 Using an Arduino Wiznet Ethernet shield.

 Circuit:

 * Ethernet shield attached to pins 10, 11, 12, 13

 created 18 Dec 2009

 by David A. Mellis

 modified 9 Apr 2012

 by Tom Igoe

 */

#include <SPI.h>
#include <Ethernet.h>

// Enter a MAC address and IP address for your controller below.
// The IP address will be dependent on your local network.
// gateway and subnet are optional:
byte mac[] = {

  0xDE, 0xAD, 0xBE, 0xEF, 0xFE, 0xED };

IPAddress ip(192, 168, 1, 177);

IPAddress myDns(192, 168, 1, 1);

IPAddress gateway(192, 168, 1, 1);

IPAddress subnet(255, 255, 0, 0);

// telnet defaults to port 23

EthernetServer server(23);

bool alreadyConnected = false; // whether or not the client was connected previously

void setup() {

  // You can use Ethernet.init(pin) to configure the CS pin

  //Ethernet.init(10);  // Most Arduino shields

  //Ethernet.init(5);   // MKR ETH shield

  //Ethernet.init(0);   // Teensy 2.0

  //Ethernet.init(20);  // Teensy++ 2.0

  //Ethernet.init(15);  // ESP8266 with Adafruit Featherwing Ethernet

  //Ethernet.init(33);  // ESP32 with Adafruit Featherwing Ethernet

  // initialize the ethernet device

  Ethernet.begin(mac, ip, myDns, gateway, subnet);

  // Open serial communications and wait for port to open:

  Serial.begin(9600);

   while (!Serial) {

    ; // wait for serial port to connect. Needed for native USB port only

  }

  // Check for Ethernet hardware present

  if (Ethernet.hardwareStatus() == EthernetNoHardware) {

    Serial.println("Ethernet shield was not found.  Sorry, can't run without hardware. :(");

    while (true) {

      delay(1); // do nothing, no point running without Ethernet hardware

    }

  }

  if (Ethernet.linkStatus() == LinkOFF) {

    Serial.println("Ethernet cable is not connected.");

  }

  // start listening for clients

  server.begin();

  Serial.print("Chat server address:");

  Serial.println(Ethernet.localIP());
}

void loop() {

  // wait for a new client:

  EthernetClient client = server.available();

  // when the client sends the first byte, say hello:

  if (client) {

    if (!alreadyConnected) {

      // clear out the input buffer:

      client.flush();

      Serial.println("We have a new client");

      client.println("Hello, client!");

      alreadyConnected = true;

    }

    if (client.available() > 0) {

      // read the bytes incoming from the client:

      char thisChar = client.read();

      // echo the bytes back to the client:

      server.write(thisChar);

      // echo the bytes to the server as well:

      Serial.write(thisChar);

    }

  }
}
See also
Arduino Ethernet Shield - Product description.
Getting started with the Ethernet Shield - Get everything set up in minutes.
Ethernet library - Your reference for the Ethernet Library.
AdvancedChatServer - A server that distributes any incoming messages to all connected clients except the one sending it.
WebClient - Query the web and get the answer through the serial monitor
WebClientRepeating - How to make repeated HTTP requests using the Ethernet shield.
WebServer - A simple web server that shows the value of the analog input.
DhcpAddressPrinter - Get a DHCP address and print it on serial monitor.
DhcpChatServer - Connect to a Telnet server and print on serial monitor all the received messages; uses DHCP.
TelnetClient - Connect to a Telnet server and print on serial monitor all the received messages
BarometricPressureWebServer - Post data read from a pressure sensor using SPI.
UDPSendReceiveString - Send and receive text strings via the UDP protocol (Universal Datagram Packet).
UdpNtpClient - query a Network Time Protocol (NTP) server and get the information through serial monitor.
Last revision 2018/08/23 by SM