Getting started with the Arduino IoT Cloud
Getting started with the Arduino IoT Cloud involves just a few simple steps that are quick and easy to follow! Further down this article, there is a section called A walk through the cloud configuration, which is there to guide you through the Arduino IoT Cloud. But first, let’s take a look at what we need in order to get started.
But if you’re itching to get started and explore the Arduino IoT Cloud yourself, that is also perfectly fine! You can always come back here for more information!
Go to Arduino IoT CloudA cloud compatible board (required)
To use the Arduino IoT Cloud, all we need is a cloud compatible board. In the picture below, we can see the full list of boards that are compatible. All of the MKR family boards can be connected to the cloud, and we can also connect the Nano 33 IoT and the Portenta H7 boards to the cloud. If you have the maker plan, you can also configure third party devices through the Manager for Linux service.
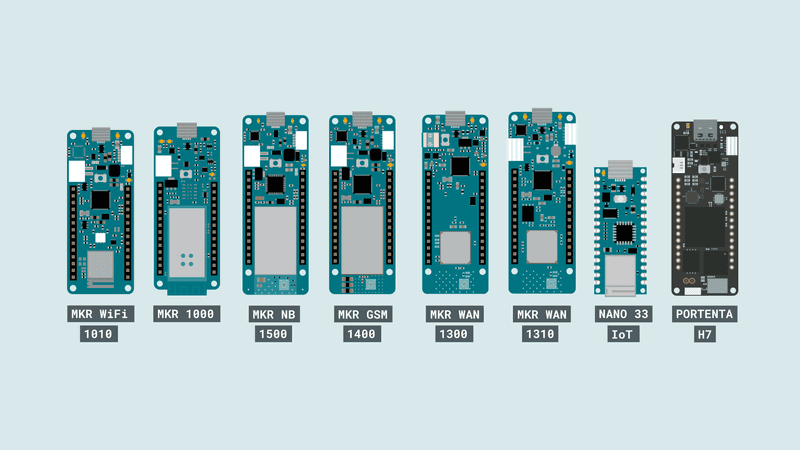
Please note: The MKR GSM 1400 and MKR NB 1500 require a SIM card to connect to the cloud, as they communicate over the mobile networks.
Please note: The MKR WAN 1300 and 1310 board requires a LoRa Gateway to connect to the cloud.
Need any help?
If you have any problems with the Arduino IoT Cloud, you can browse through common troubleshooting issues and find information on different features in the Arduino Help Center. If you don’t find the answer you are looking for, we are always happy to help you with any question regarding our products!
Go to Arduino Help CenterA walk through the configuration
Setting up the Arduino IoT Cloud and accessing the different features available involves a few simple steps. So let’s take a look at how to go from start to finish!
1. Sign up to Create
The Arduino IoT Cloud is part of the Create environment which also includes the Web Editor, Digital Store and Manager for Linux. To use the cloud, we need to first sign up to Create.
2. Go to the Arduino IoT Cloud
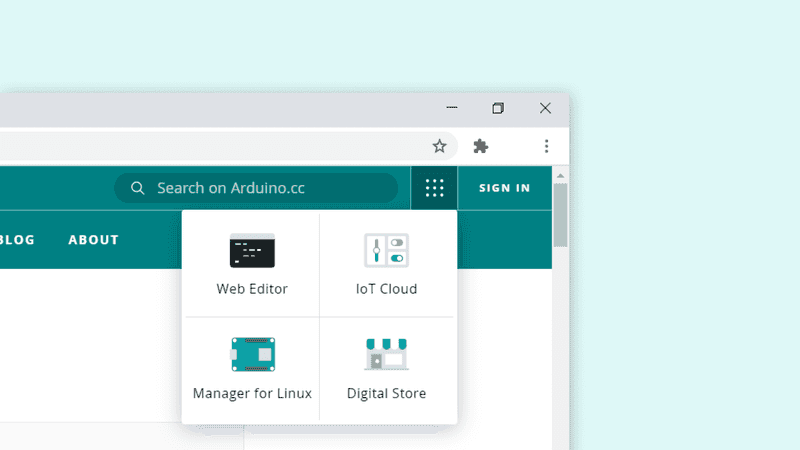
You can access the Arduino IoT Cloud from any page on arduino.cc by clicking on the four dots menu in the top right corner. You can also go directly to the Arduino IoT Cloud.
3. Creating a thing
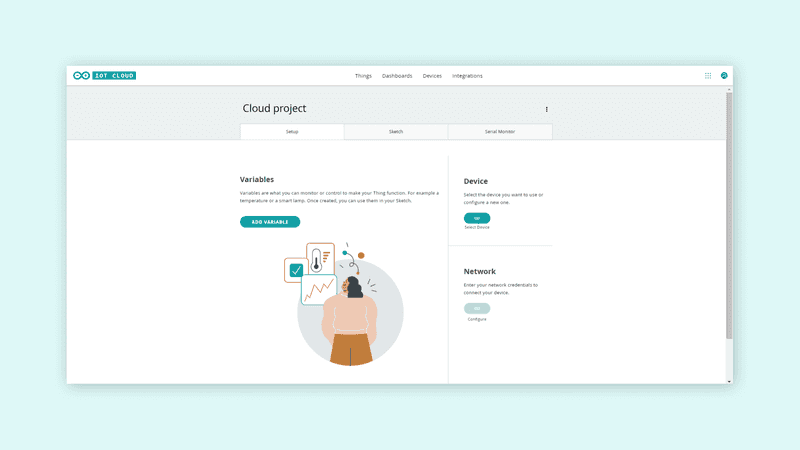
The journey always begin by creating a new Thing. In the Thing overview, we can choose what device to use, what Wi-Fi network we want to connect to, and create variables that we can monitor and control. This is the main configuration space, where all changes we make are automatically generated into a special sketch file.
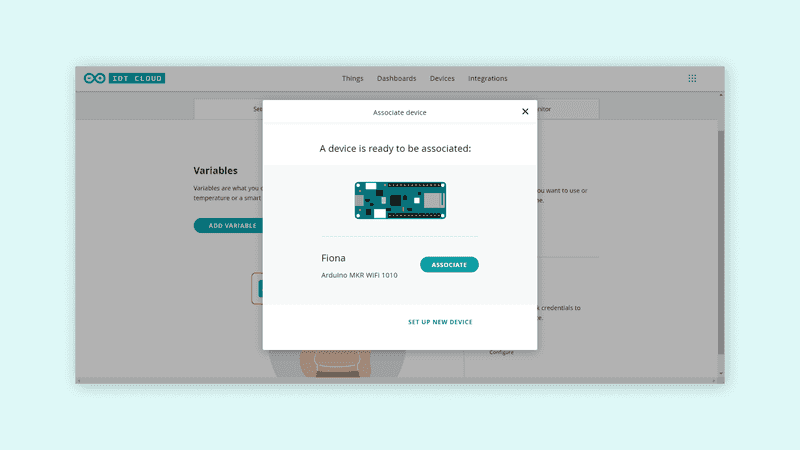
4. Configuring a device
Devices can easily be added and linked to a Thing. The Arduino IoT Cloud requires your computer to have the Arduino Agent installed. The configuration process is quick and easy, and can be done by clicking on the “Select device” button in the Thing overview. Here, we can choose from any board that has been configured, or select the “Configure new device” option.
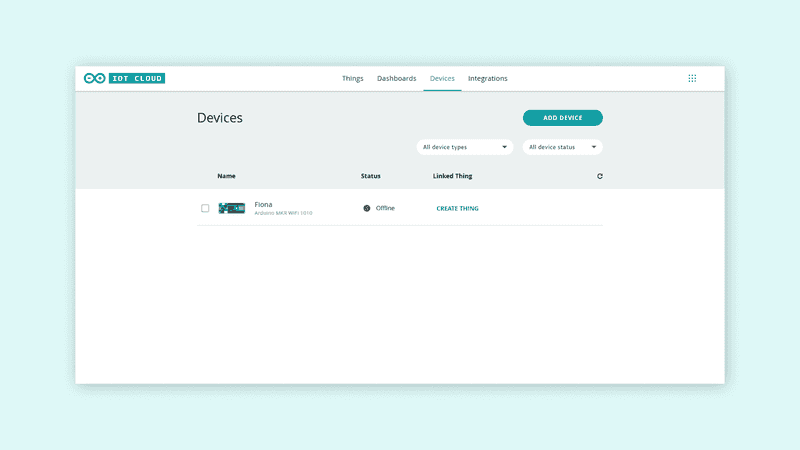
We can also get a complete overview of our devices by clicking the “Devices" tab at the top of the Arduino IoT Cloud interface. Here we can manage and add new devices.
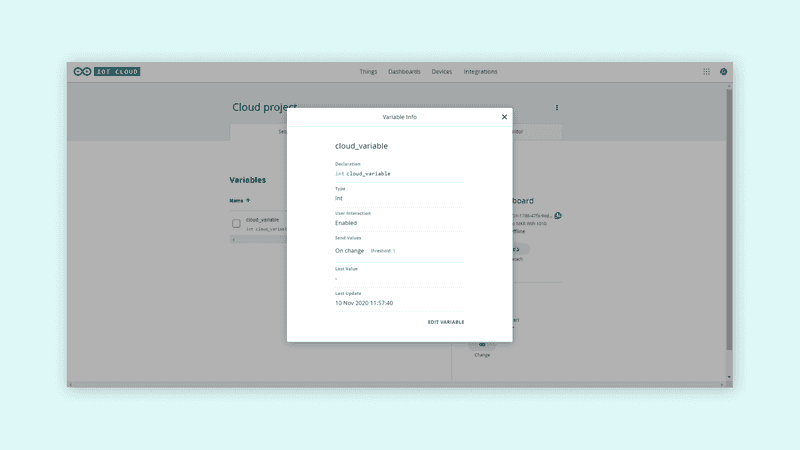
5. Creating variables
The variables we create are automatically generated into a sketch file. There are several data types we can choose from, such as int, float, boolean, long, char. There’s also special variables, such as Temperature, Velocity, Luminance that can be used. When clicking on the “Add variable” button, we can choose name, data type, update setting and interaction mode.
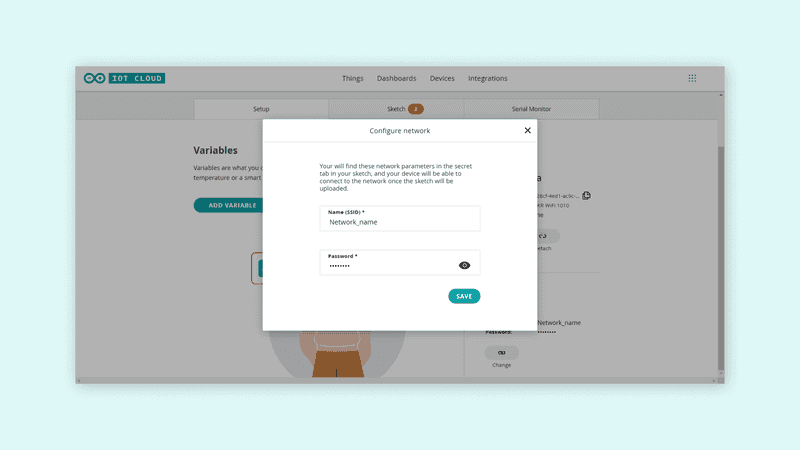
6. Connecting to a network
To connect to a Wi-Fi network, simply click the “Configure” button in the network section. Enter the credentials and click “Save”. This information is also generated into your sketch file!
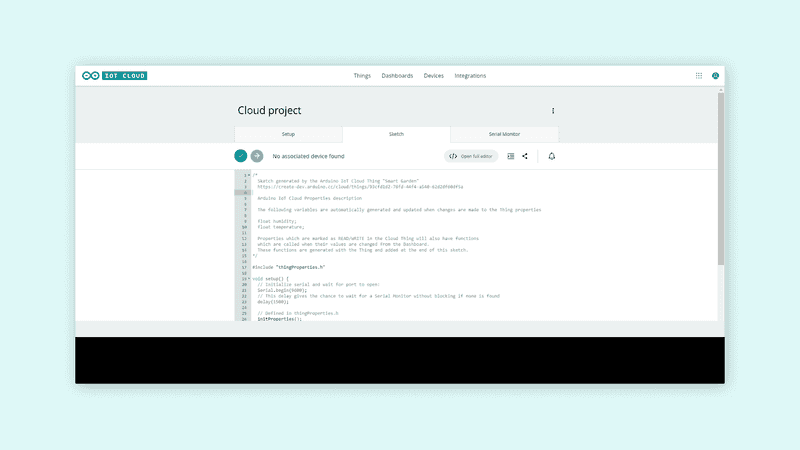
7. Editing the sketch
Now, while we have configured variables, devices and network settings we can get to the coding! A special sketch file can now be found in the “Sketch” tab, which includes all of these configurations. We can now create a sketch that, for example, reads an analog sensor, and use the cloud variable to store it. When the sketch has been uploaded, it will work as a regular sketch, but it will also update the cloud variables that we use!
Additionally, each time we create a variable that has the Interaction Mode enabled, a function will also be generated. Each time this variable is triggered from the cloud, it will execute the code within this function! This means that we can leave most of the code out of the loop() and only run code when needed.
When we are happy with our sketch, we can upload it to our board, by clicking the upload button.
After we have successfully uploaded the code, we can open the “Serial Monitor” tab to view information regarding our connection. If it is successful, it will print “connected to network_name” and “connected to cloud”. If it fails to connect, it will print the errors here as well.
8. Creating a dashboard
Now that we have configured the device & network, created variables, completed the sketch and successfully uploaded the code, we can move on to the fun part: creating dashboards!

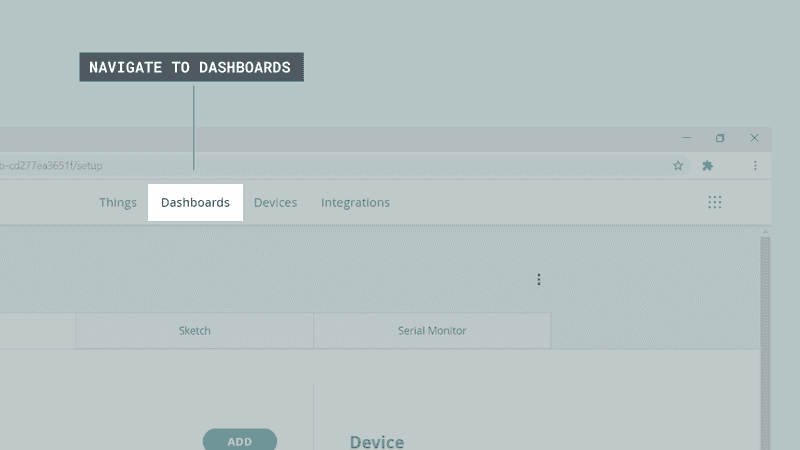
Dashboards are visual user interface for interacting with your boards over the cloud, and we can setup many different setups depending on what your IoT project needs. We can access our dashboards by clicking on the “Dashboards” tab at the top of the Arduino IoT Cloud interface, where we can create new dashboards, and see a list of dashboards created for other Things.
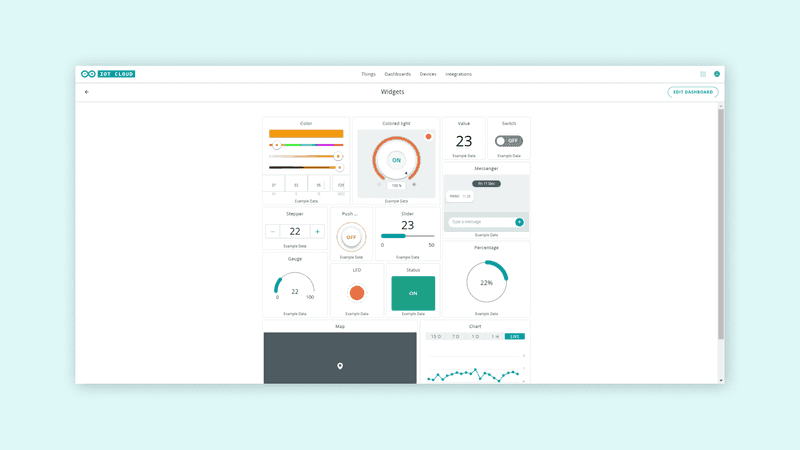
If we click on “Create new dashboard”, we enter a dashboard editor. Here, we can create something called widgets. Widgets are the visual representation of our variables we create, and there are many different to choose from. Below is an example using several types of widgets.
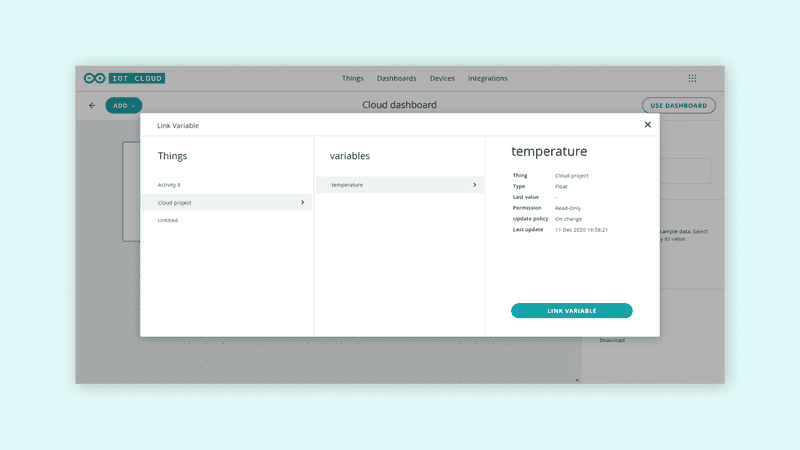
When we create widgets, we also need to link them to our variables. This is done by clicking on a widget we create, select a Thing, and select a variable that we want to link. Once it is linked, we can either interact with it, for example a button, or we can monitor a value from a sensor. As long as our board is connected to the cloud, the values will update!
Let's say we have a temperature widget that we want to link to the temperature variable inside the Cloud project thing.
Please note: Please note: Not all widgets can be linked to a variable. We can for example not link a switch widget to a int variable as the data types are different. The variables that a widget can’t link with will be greyed out, so we can’t accidentially link a widget to the wrong variable.
We can also have several things running at once, depending on your Arduino IoT Cloud plan, which we can include in the same dashboard. This is a great feature for tracking multiple boards in for example a larger sensor network, where boards can be connected to different networks around the world, but be monitored from the same dashboard.
Congratulations

These are the few simple steps needed to create our very own IoT project. Having a project connected to the cloud opens up many possibilities, such as tracking data in real time, trigger remote devices and building wireless systems.
What will you create?
Start your IoT journeyAuthor: Karl Söderby
Reviewed by: José García
Date: [14/12/20]