Arduino LCD playground | 12864 LCD library
12864 is an unofficial Arduino library that supports 12864 Graphic LCDs that use the ST7920 chip.
Download the library here:
https://playground.arduino.cc/uploads/Code/LCD12864.zip

////////////////////////////////////////////////////////
The library has been created by Markos Kyritsis, it is (of course) copyleft, which means you can take it and do whatever you want with it. But please, please, if you optimise it in any way, then contribute to the community and upload a copy for everyone else =D
Forum discussion here: http://forum.arduino.cc/index.php/topic,37687.html
////////////////////////////////////////////////////////
Here is a list of issues with the current version of the library:
Also, you can't draw a cropped part of the second screen yet (cropping is only supported on screen one).
Now here is what it CAN do:
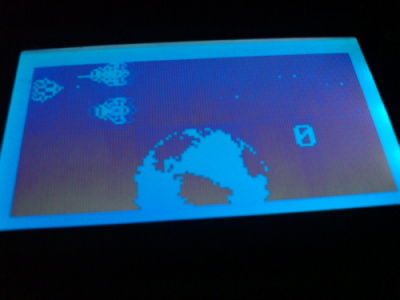
Download the PONG game from here: https://playground.arduino.cc/uploads/Code/pongLCD.zip
You also need to connect a POT with 5V on one side, ground on the other, and 5V (perhaps with 150 Ohm resistance) + LCD Pin 19 to the wiper (middle one usually). Otherwise you won't see much.
If you need to change these values, you can find them in the LCD12864.h file. I tend to put CSEL in pin 12 in order to get the extra analog pin for joystick connections, etc...
All commands must follow an instance of the library. The instance is created automatically when you include the library, and has been named LCDA. So if you want to call Initialise(), you would call it by typing LCDA.Initialise();
setdelay(int newtime) Set a delay in ms, default is 80
Initialise() Init the LCD screen, clears the garbage on top and bottom screen, immediately sets it to graphics mode
Render() Call this after Initialise() to start the rendering process
Draw(bool t, int x, int y) This method enable or disables graphics mode
RenderScreenBuffer(int startX, int startY, int maxX, int maxY) Render a cropped rectangle of the screen buffer. Useful if you don't really want to render the whole screen (increases processing speed).
RenderScreenBuffer(int screen) Render the whole screen
DumpScreenBuffer(int startX, int startY, int maxX, int maxY) Dump a cropped rectangle of the screen buffer. Useful if you don't really want to dump the whole screen (increases processing speed).
DumpScreenBuffer() Dump the whole screen
setPins(int tRS, int tRW, int tD7, int tD6, int tD5, int tD4, int tD3, int tD2, int tD1, int tD0) Pass a command directly to the screen
Duplicate(bool x) Can duplicate what is shown in the first screen, onto the second screen, default is false
DrawBrLine(int x0, int y0, int x1, int y1) Draw Bresenham line (straight line using the Bresenham algorithm)
DrawCircle(int x0, int y0, int radius) Draw Circle (uses the mid-point circle algorithm)
DrawRectangle(int x0, int y0, int width, int height) Draw a nice rectangle =D
FillRectangle(int x0, int y0, int width, int height) Draw a nice filled rectangle
Please be careful, stay above the minimum value, and below the maximum value, otherwise program might crash.
Lets try to draw a Circle, and a the number 012 on screen
First, we Initialise the LCD
LCDA.Initialise();
Let's delay a little bit
delay(500);
Now to start the rendering process (graphics on)
LCDA.Render();
Lets draw a circle
LCDA.DrawCircle(30,135,5);
The circle has been drawn to an off screen buffer, time to draw it on screen!
LCDA.RenderScreenBuffer(2); // lets draw it in the second screen
O.K. we said we need some characters in there as well. So lets enable ASCII mode and delay (we need at least 1 ms delay):
LCDA.Draw(false,4,0);
delay(1);
If we convert the characters '0', '1', and '2' we get the following 8 bit binary:
LCDA.setPins(1,0,0,0,1,1,0,0,0,0);
LCDA.setPins(1,0,0,0,1,1,0,0,0,1);
LCDA.setPins(1,0,0,0,1,1,0,0,1,0);
Now to wrap it all up, we set Draw back to true, if you don't do this the circle won't appear
LCDA.Draw(true,4,0);
Here is one way to draw a bitmap onto the screen:
Now that you have successfully compiled your program, you can draw the image by using:
LCDA.DrawSprite(2,1); // 2 is the xPOS, 1 is the yPOS
delay(500); // you may or may not need the delay
LCDA.RenderScreenBuffer(1);
You can also create arrays like the char header_data[] in your sketch as well, and draw them manually (look at how this is done in the .cpp file). This is useful if you are creating a game, and need more than one image on the screen.
The screen will work together with an SD card in order to exceed the current memory limits on the amount of bitmaps you can store. I plan to use the extra memory in order to create a simple yet relatively powerful (for home-made) hand held console. I hope to achieve this by merging my library with the SDuFat library. Coming soon!


