Reaction Time Tester
As my first foray into Arduino development, I built a simple toy called a Reaction Time Tester. Designed to be an instructive exercise in construction, the RTT actually turns out to be pretty fun to play with too.
You press the big red button to start play. When the green light comes on, you release the button as quickly as possible, and the RTT displays the number of milliseconds that it took you to react. Repeat 10 times, and your "score" for the "game" is the sum of the 10 individual response times.
Your goal, of course, is to try to minimize your cumulative score. At the end of the game, the top 10 all-time scores (stored in EEPROM) are displayed on the 7-segment display panel. If you are lucky enough to get the low score, LEDs flash admiringly.

Fig 1. An early Response Tester prototype
Hardware
The hardware for this project is fairly simple. (As a software engineer, this was one of my core requirements. :)) There are three LEDs and a simple pushbutton switch of the kind you find in arcade consoles. The Yellow ("Get ready!") LED begins to flicker rapidly to prepare the player. At some random time between 2 and 5 seconds later, the Green ("Go!") LED illuminates, signaling the player to release the switch. If the player releases too early, the Red LED comes on, "CHEAT" appears on the display, and the game comes to a humiliating halt.
The display I chose is a very cheap ($4 USD) multi-7-segment display called the HC4LED. You could also make this project with a serial or parallel LCD module, but since I (mostly) only need to display 3- and 4-digit numbers, this suits just fine. I wrote a library for the HC4LED that anyone is welcome to play with.

Fig 2. The HC4LED display unit
The microcontroller is Adafruit's Boarduino, which I chose mostly because it is cheaper and smaller than the bonafide Arduino. The finished project fits into a 10 cm cube box.
Materials List
| Item | Supplier |
| 4x4x3" box | Michael's |
| Happ gaming pushbutton | GroovyGameGear.com |
| DC Boarduino | Adafruit |
| 2.1mm 9v power supply | Adafruit |
| 2.1mm female coax plug | Radio Shack |
| LEDs (5mm) | Various |
| LED mounts | Jameco |
| 220 Ohm resistors | Various |
| 10K Ohm resistor | Various |
| HC4LED display module | Hitt Consulting |
Wiring
- Using 220 Ohm current limiting resistors, connect the three LEDs from Arduino pins to ground as follows:
- Pin 10 -> Green/Go
- Pin 11 -> Yellow/Get Ready
- Pin 12 -> Red/Cheat
- Connect the switch to Arduino pin 8. Use a 10K Ohm pull-up resistor.
- Connect the HC4LED Data, Clock, and Blank lines to Arduino as follows:
- Pin 4 -> HC4LED "Data" pin 6 (leftmost: see datasheet)
- Pin 5 -> HC4LED "Clock" pin 5 (2nd from left)
- Pin 7 -> HC4LED "Blank" pin 3 (4th from left)
- Connect the HC4LED ground and +5V pins 1 and 2 to the appropriate outputs on the Arduino/Boarduino.

Fig 3. The breadboard prototype
Construction
In a small box, drill three 1/4" holes for the LEDs, one 1 1/8" hole for the button switch, and a 5/8" x 1 5/8" rectangular hole for the HC4LED display. In the side of the box, make a 7/16" hole for the power connector. Wire the power connector to the Arduino power inputs.
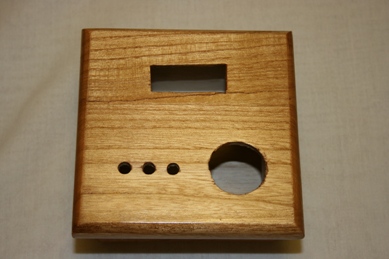
Fig 4. The box lid
Software
The software for this project makes use of the HC4LED library. The basic flow of the main program is as follows:
- (Setup) If the button is pressed at power up, erase all the high scores stored in the EEPROM.
- (Loop) While the button is not pressed, display the top ten high scores stored in the EEPROM. If the last player got a high score flash the Yellow and Green LEDs exuberantly. If the last player was disqualified because of a CHEAT, flash the Red LED scoldingly.
- (Loop) Once the user presses and releases the button, begin a game. Repeat this 10 times:
- Flicker the Yellow LED until the user presses the button.
- Begin counting a random number of milliseconds between 2000 and 5000.
- At expiration, turn off the Yellow LED and illuminate the Green one.
- When the player releases the button, record the reaction time.
- At the end of the game, report whether the player made it into the top 10 and store his final score.
Conclusions
This was fun to build and continues to provide some entertainment value for my kids. I'm even building a few for family friends. It's interesting to see the variance between different people's scores. With my lifetime of video game training, I'm not surprised that I have the best average scores (upper 1500s to lower 1600s) of our immediate circle. I was surprised, though, to see that my 11-year-old daughter (scores in the 1700s) can absolutely destroy my baseball and video-game playing 10-year-old son (scores in the 2400s). Why is that? Is it the gender difference? The 18-month age difference? The fact that girls mature faster than boys? With school science fair season rapidly approaching, I can think of a number of interesting research projects that this little box may help bring to fruition.
Mikal Hart
mhcom <at> sundial <dot> com