9V Battery Adapter for the Arduino
by djmatic
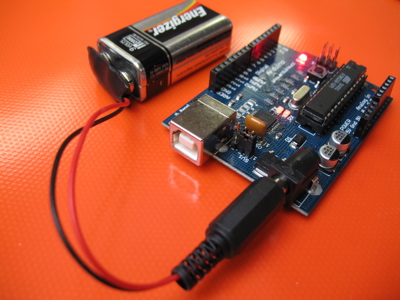
With just two parts your Arduino goes portable, powered by a 9V battery. Note that these connections are the same ones you'd use to make a plug to connect to a solar cell array, a car lighter plug or a larger battery.
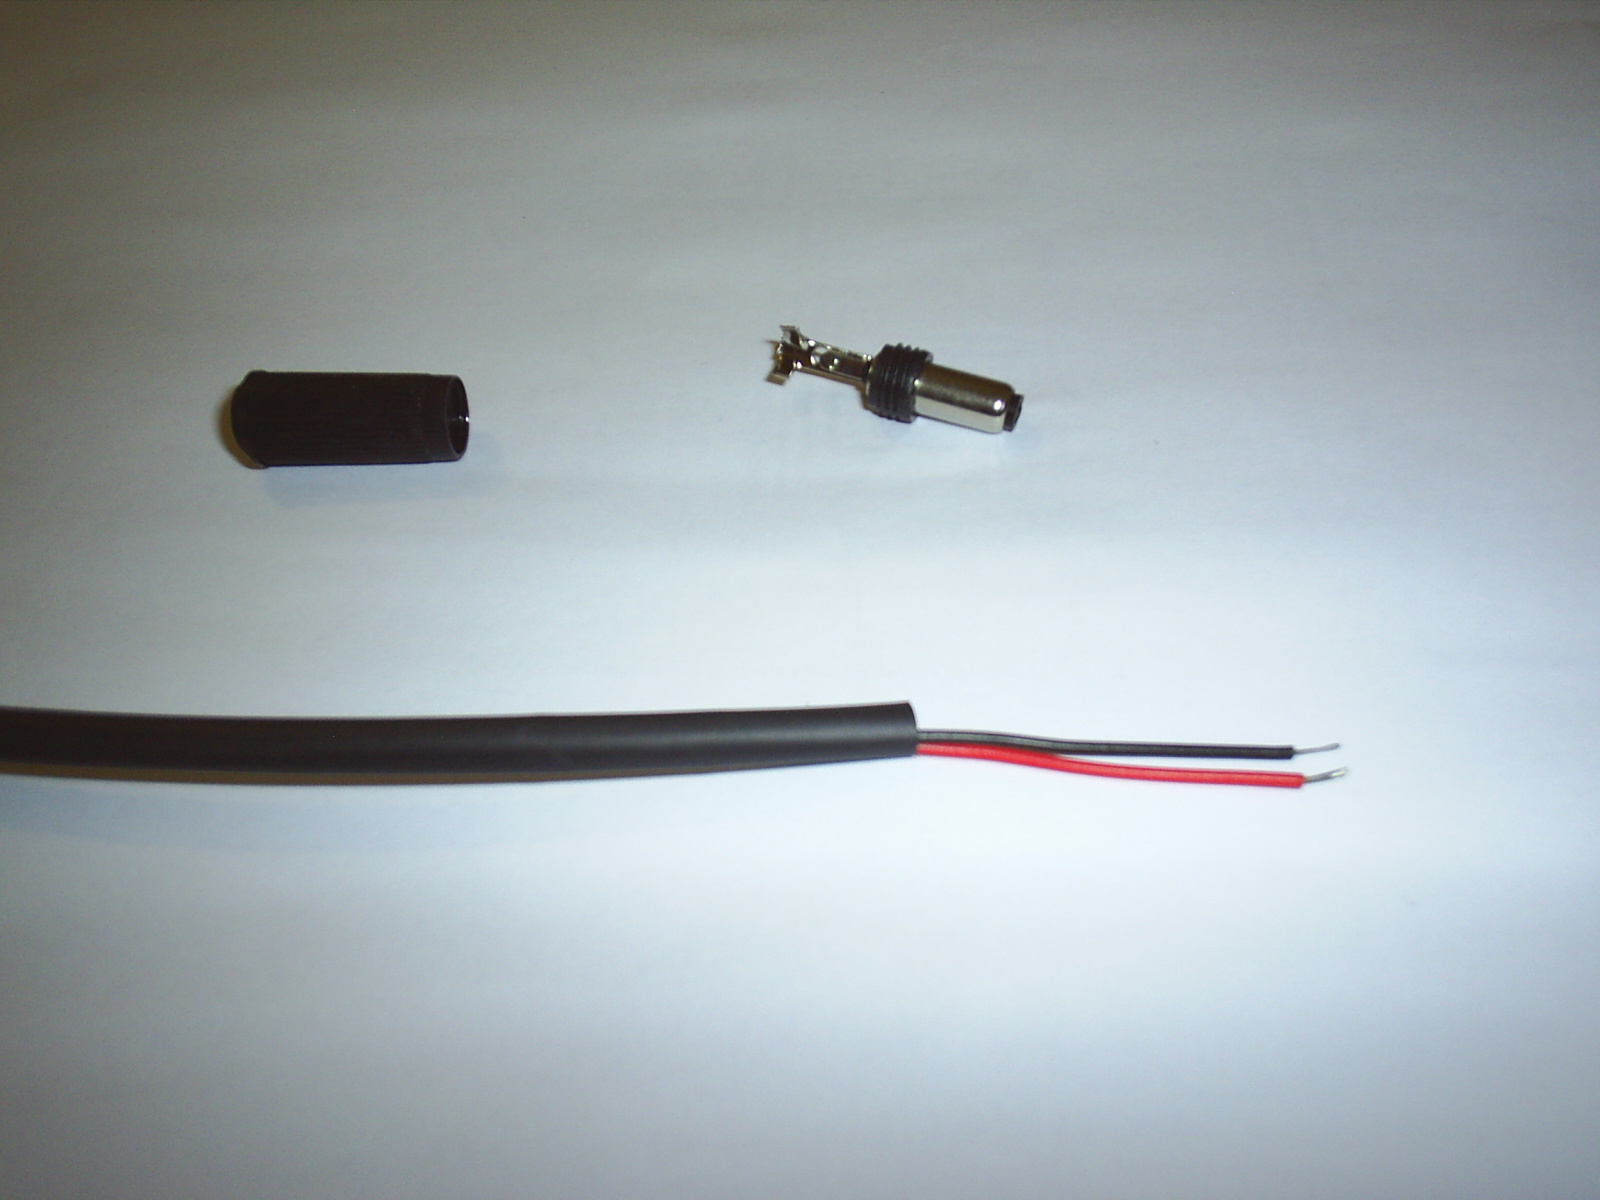
You'll need a 9V battery clip (snap connector), a 2.1mm power plug, a soldering iron and some solder, and optionally a small piece of heat shrink tubing. Any hobby shop should have these items.
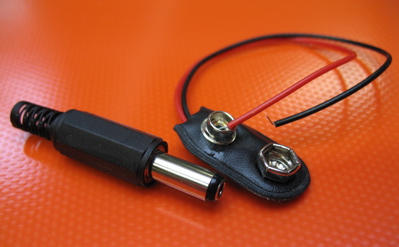
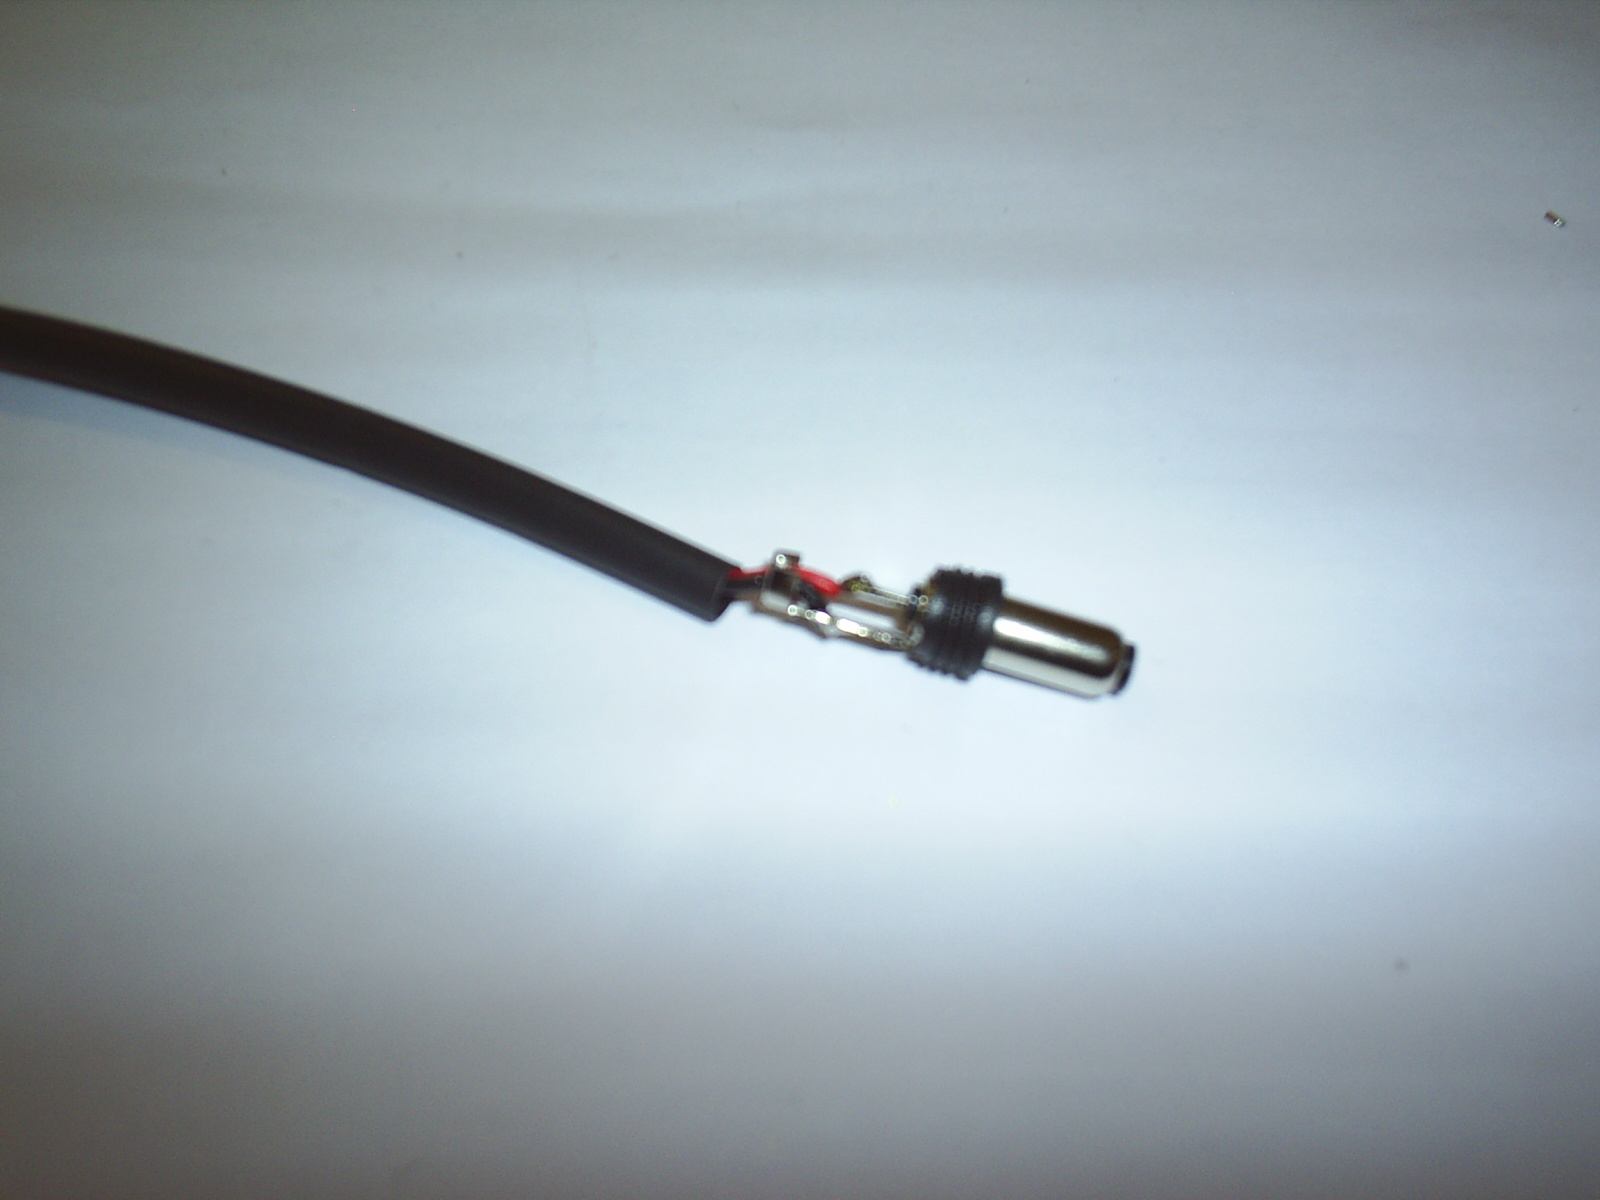
First, slide the outer shell of the plug over the battery clip's wires. Optionally, slide a piece of heat-shrink tubing over the red (+) wire to protect the positive connection. Next, solder the battery clip's black (-) wire to the outside connection of the plug. Then solder the battery clip's red (+) wire to the centre connection of the plug. If you choose to add the heat-shrink tubing, slide it down over the center connection.


Once the wires are soldered, slip the heatshrink over the positive connection and gently crimp the wires in place with the small metal tabs. Add some hot glue (not shown) over the connection area for further reliability.

Happy times:
Tip for a nice looking 9V Battery Adapter
by MKazan
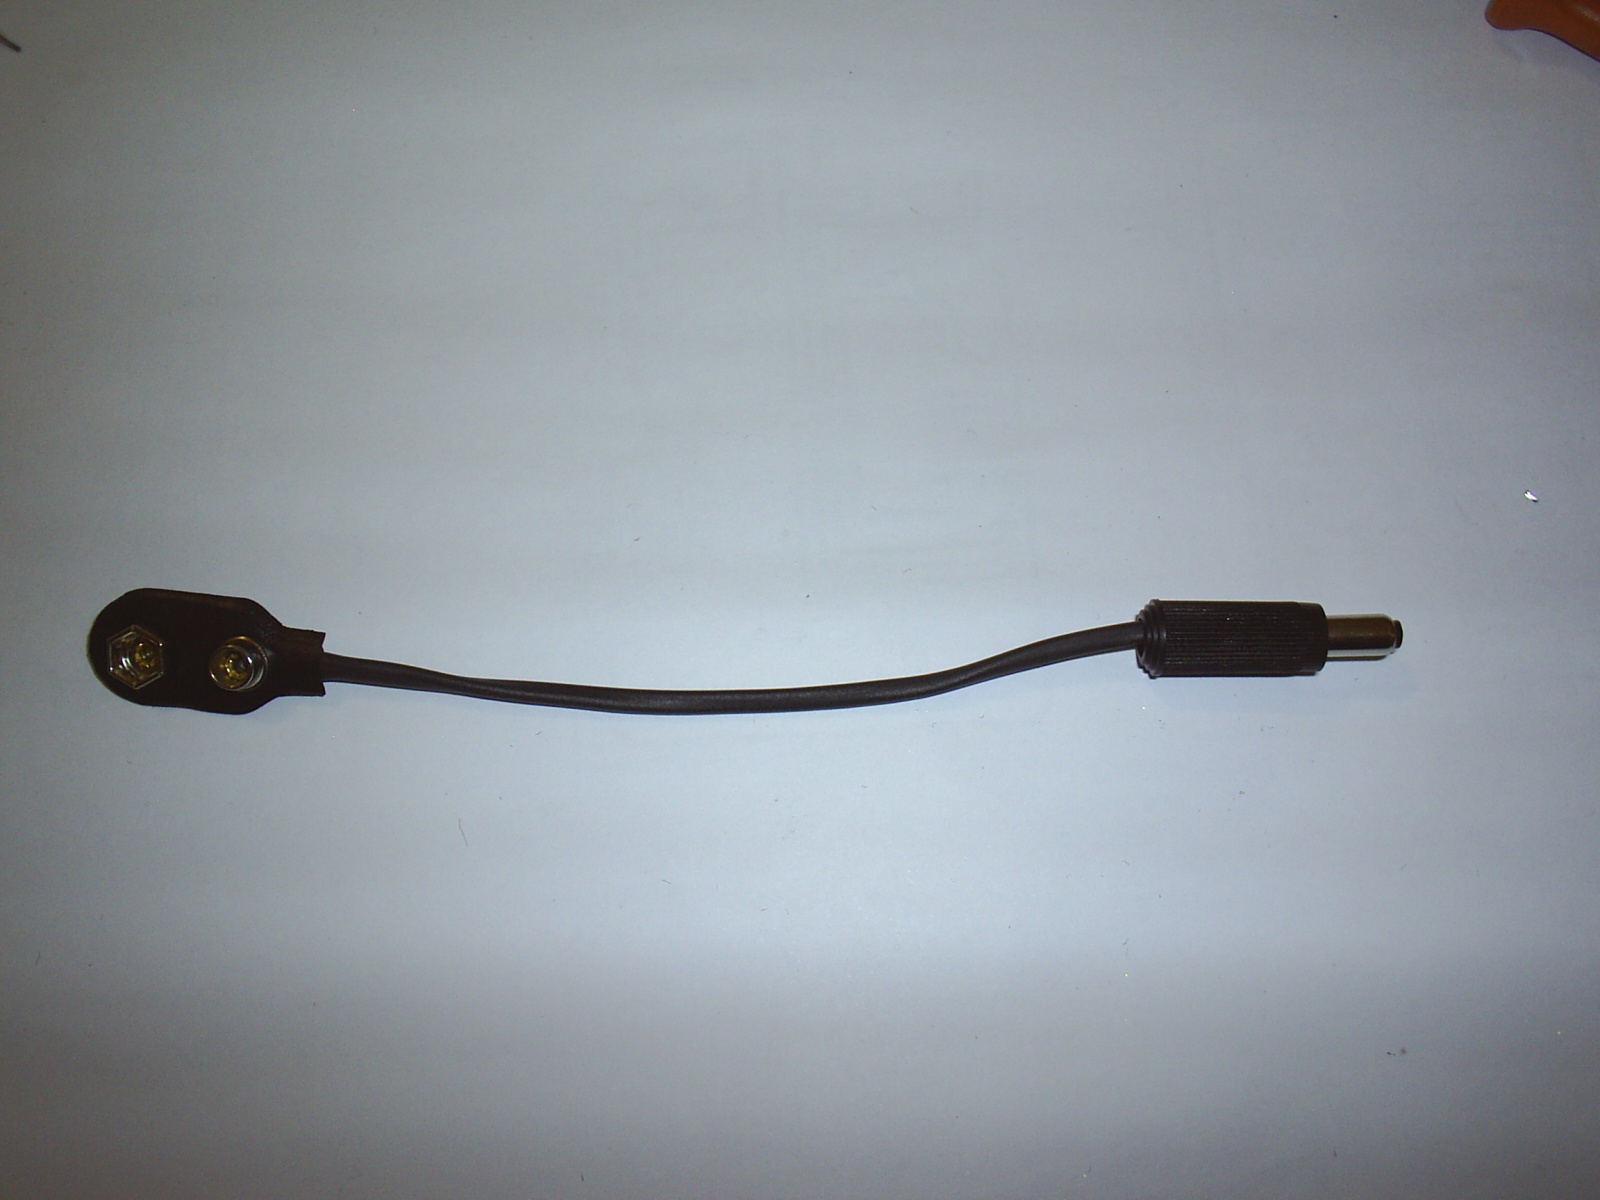
With a piece of some cm of shrink tube, you can give djmatic´s 9V Battery Adapter a nice Pro style look.
You´ll need the same 9V battery clip and 2.1mm power plug as above. Plus, you´ll need a piece of 3mm (or something close) shrink tube.

Pass the 9V battery clip wires through the shrink tube and cut to size. Make shure the shrink tube fits inside the clip´s plug cavity.

Pass the 2.1mm Power Plug cover through the entire thing and then you can solder the plug´s tip.

Heat shrink it, mount the cover in it´s place and call your mama to show her your professional looking, kitchen table made, 9V Battery Adapter.