Simple Servo Control tutorial
Introduction
This tutorial explains how to control a servo from your computer using arduino, processing and Arduino Diecimilia. Don't be fooled, almost none of this is my own code. I've just done all the cut and pasting for you :p
This example uses the Software Servo Library.
Connections
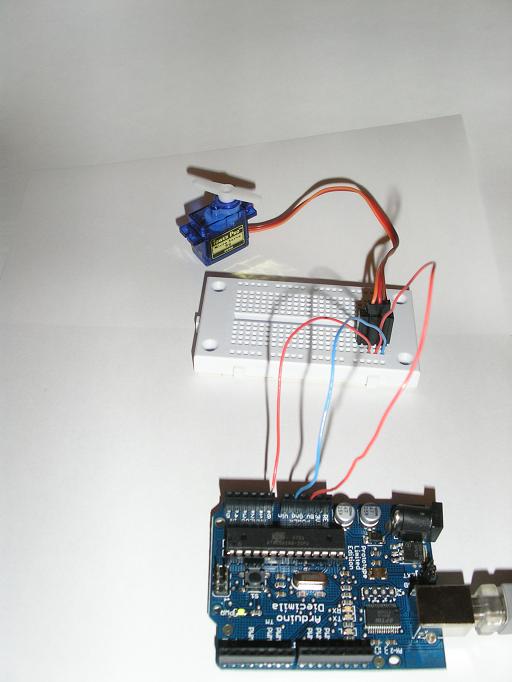
It's really very simple to connect the servo to the arduino board.
See the pictures:
https://playground.arduino.cc/uploads/Learning/simpleservocontrol1.jpg https://playground.arduino.cc/uploads/Learning/simpleservocontrol2.jpg
Power
Connect the red from servo to +5V on arduino.
Ground
Connect black/brown from servo to Gnd on arduino.
Signal
Connect white/orange from servo to Analog in 0 on arduino.
Arduino code
This code is the same as in Software Servo Library. It's made for two servos, but we're going to take advantage of just one.
For this code to compile succesfully in arduino, you'll need the code: https://playground.arduino.cc/uploads/ComponentLib/servo.zip.
The contents of that zip-package go into arduino-xxxx/hardware/liraries-directory.
#include <Servo.h>

Servo servo1; Servo servo2;


void setup() {

  pinMode(1,OUTPUT);
  servo1.attach(14); //analog pin 0
  //servo1.setMaximumPulse(2000);
  //servo1.setMinimumPulse(700);

  servo2.attach(15); //analog pin 1
  Serial.begin(19200);
  Serial.println("Ready");

}

void loop() {

  static int v = 0;

  if ( Serial.available()) {
    char ch = Serial.read();

    switch(ch) {
      case '0'...'9':
        v = v * 10 + ch - '0';
        break;
      case 's':
        servo1.write(v);
        v = 0;
        break;
      case 'w':
        servo2.write(v);
        v = 0;
        break;
      case 'd':
        servo2.detach();
        break;
      case 'a':
        servo2.attach(15);
        break;
    }
  }

  Servo::refresh();

}
Processing code
To control the servo with a mouse, here's a simple code made with processing to do the job. You don't have to use this code, you can also send commands to the arduino board from arduino IDEs Serial monitor. (Servo position 0 to 180 are commands 0s and 180s respectively)
There's some graphics code also, but really only the lines with comments are relevant to controlling the servo.
Basically this code takes the mouseX position (0 to 720) and divides it with 4 to get an angle for the servo (0-180). Finally the value is outputted to serial port with a prefix 's'. (Note: the 's' should actually be a suffix, but since this is ran over and over it does not matter for the result)
Remember to first just check with println(Serial.list()) the COM-port that should be used.
/**
 * Servocontrol (derived from processing Mouse 1D example.)
 *
 * Updated 24 November 2007
 */


// Use the included processing code serial library
import processing.serial.*;


int gx = 15;
int gy = 35;
int spos=90;

float leftColor = 0.0;
float rightColor = 0.0;
Serial port;                         // The serial port


void setup()
{
  size(720, 720);
  colorMode(RGB, 1.0);
  noStroke();
  rectMode(CENTER);
  frameRate(100);

  println(Serial.list()); // List COM-ports

  //select second com-port from the list
  port = new Serial(this, Serial.list()[1], 19200);
}

void draw()
{
  background(0.0);
  update(mouseX);
  fill(mouseX/4);
  rect(150, 320, gx*2, gx*2);
  fill(180 - (mouseX/4));
  rect(450, 320, gy*2, gy*2);
}

void update(int x)
{
  //Calculate servo postion from mouseX
  spos= x/4;

  //Output the servo position ( from 0 to 180)
  port.write("s"+spos);


  // Just some graphics
  leftColor = -0.002 * x/2 + 0.06;
  rightColor =  0.002 * x/2 + 0.06;

  gx = x/2;
  gy = 100-x/2;

}