A Solenoid Tutorial.
You can not drive a solenoid directly from your Arduino. It requires more current than you can provide and produces destructive voltages when it is switched off. There is a simple solution.
Solenoids take a lot of power
The solenoid I was testing with is a 12 volt solenoid the size of my thumb. It passes 1 amp of current when turned on and becomes uncomfortably warm to hold if left on. Your Arduino can only pass about 40mA from a pin. You probably will need to measure your solenoid before you can choose components. Use your ammeter to measure the solenoid's current draw when you power it directly from the power supply.
Solenoids are Inductors
A solenoid is a coil of wire with a magnetic core. This is virtually identical to a large inductor, so it should not be surprising that they have inductance. i.e. Once a current is moving in the solenoid it will attempt to continue moving that current. This can be fatal to your digital device when it switches off the solenoid and the solenoid creates a voltage across its leads large enough to either move the current, arc through the air, or burn through a semiconductor. The solution is to provide an easy and safe path for the current to flow until it dissipates the energy stored in the magnetic fields of the solenoid.
Don't panic at the schematic
Most of the schematic is test point labels and my extra protection circuitry for testing the bad configurations. You really only need D1, L1, Q1, and a resistor to be named later.
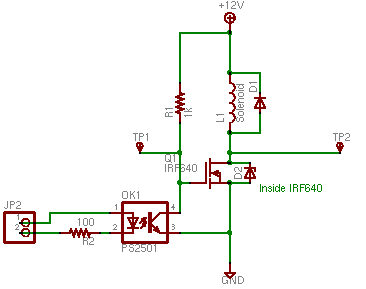
The bypass diode
The schematic shows a bypass diode, D1. When the solenoid is on or idle this diode will not conduct. Its top terminal will be at a higher or equal voltage. When the solenoid is turned off and tries to continue forcing current downward, this current can flow back up through D1 until the energy is dissipated. This will clamp TP2 to no more than 13v or so. This diode must be able to pass whatever current passes through the solenoid and have a reverse breakdown voltage of at least the power supply voltage.
The other protective device
The IRF640 shown in this circuit operates as if it has a zener diode in parallel. A zener diode acts like a regular diode until its reverse voltage exceeds a specified voltage, then it conducts in the reverse direction. In this case the IRF640 acts like a 200V zener, so once the inductive kick hits 200V it will pass through the FET to ground. This could be sufficient, but I don't care for it as a protective measure:
- It still generates a large voltage that I would have to be careful to isolate.
- The transistor is specified in terms of total pulse energy. This is hard to calculate or measure so I would not be certain I was within specifications.
Still, it's nice to know it's there and I did operate the circuit with only this mechanism while collecting some of the data shown here.
Making enough current
The IRF640 is a field effect transistor. These can be operated as voltage controlled switches. If the gate voltage is 0 the switch will be off. If the gate voltage is high then the switch will be on, about like a 0.18ohm resistor. Do not let the gate voltage be in between if you are using the transistor as a switch, it can partially conduct, dissipate a lot of energy, and overheat. The FET shown is overkill for this circuit, it can pass 18 amps and withstand 200 volts. It was only selected because I pulled it out of a ruined UPS. You could use any N channel FET that will withstand your voltage and currents. Plan a factor of two safety margin if you can.
You could also use an NPN bipolar transistor. You need to make sure that you saturate the transistor. That is... 40ma (your arduino current) times the current gain of the transistor (hfe) needs to be larger than your solenoid's current. I'd shoot for twice as large to be safe. These will not have the second safety diode behavior, so don't screw up D1.
Not frying your Arduino
The schematic shown is from my test circuit where I knew I would operate without the bypass diode. OK1 is an optoisolator which completely separates the Arduino from the test circuit electrically. Somewhat unfortunately, I connected it as an inverter, so the solenoid is on unless the arduino pin is set as an output and turned on. I don't recommend that.
You do not need the optoisolator. You can drive the gate of the FET with the digital pin directly and omit R2, R1, and OK1. You do need to connect your Arduino ground to the ground shown on the circuit and also place a 10k resistor from the gate to ground to make sure it stays off unless the arduino pushes it on. FET gates are very high impedance and will float at mysterious voltages if you let them.
What does the current and voltage look like?
As long as I was testing the solenoid circuit I captured some of the measurements and the set up.
The test fixture
I recommend no practice that you see here, other than: If you don't understand something and need to, then start testing and figure it out.

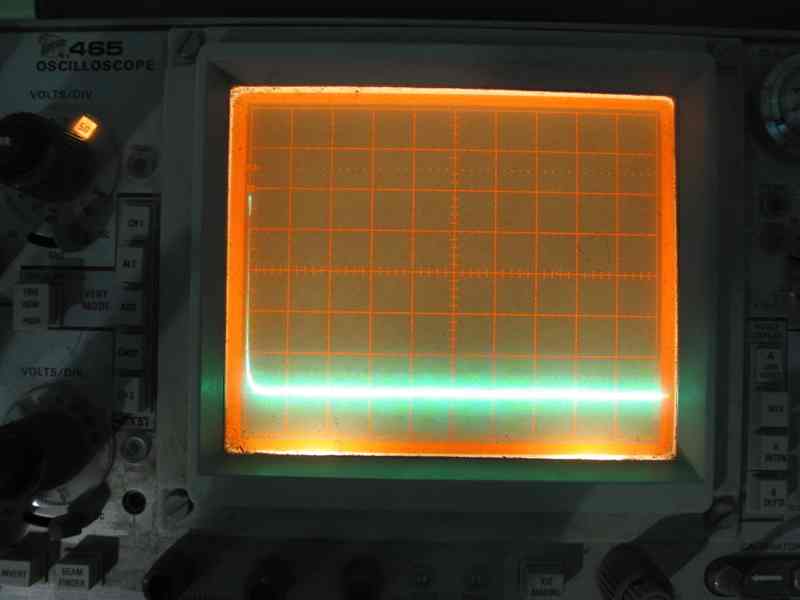
Here on the bottom trace we see the gate voltage, 10V/div, 20mS/div. The top trace is measuring the current through the FET, it climbs to just over 1 amp. That non-monotonic climb is caused by the solenoid core moving. If I hold the core either in or out there is a monotonic rise. The little step after the signal drops comes from me holding a camera for a 1 second exposure, it is not real.
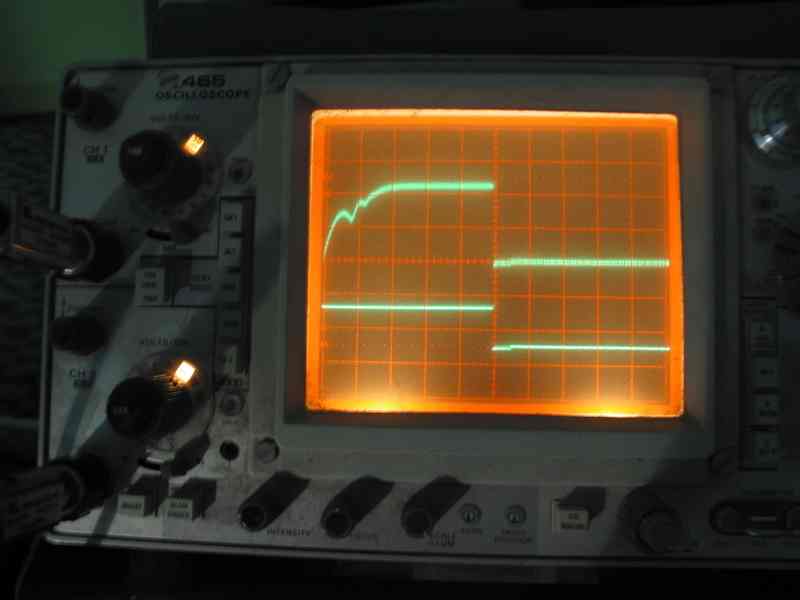
Here is the inductive kick without a bypass diode. This trace begins just as the FET is turned off. Notice the vertical scale is 50 volts per division. You are looking at nearly 250 volts, my FET is a bit above spec.