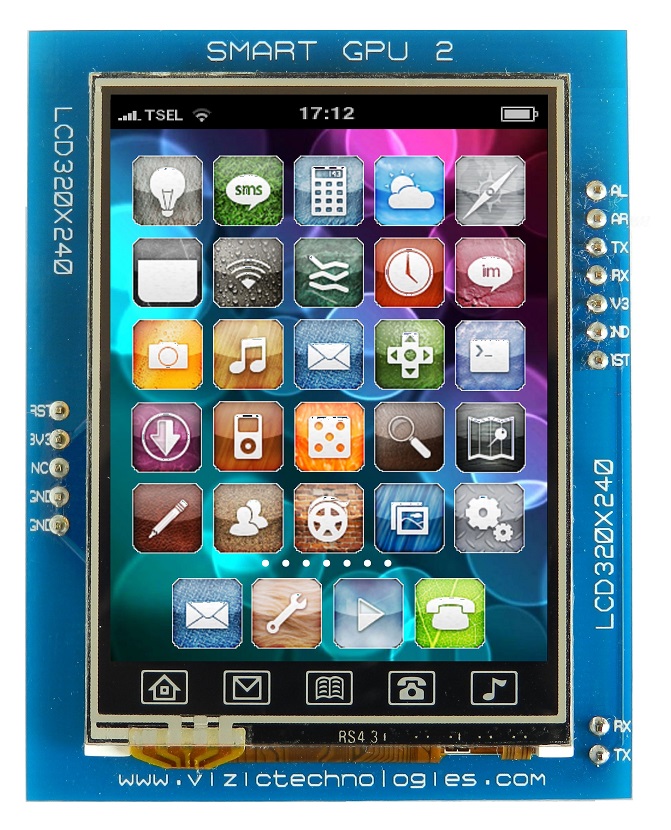
This page presents a library to use a SmartGPU 2 intelligent embedded graphics processor with a 2.4" touch screen from vizic technologies: http://www.vizictechnologies.com/#!smartgpu-2/c1rc2
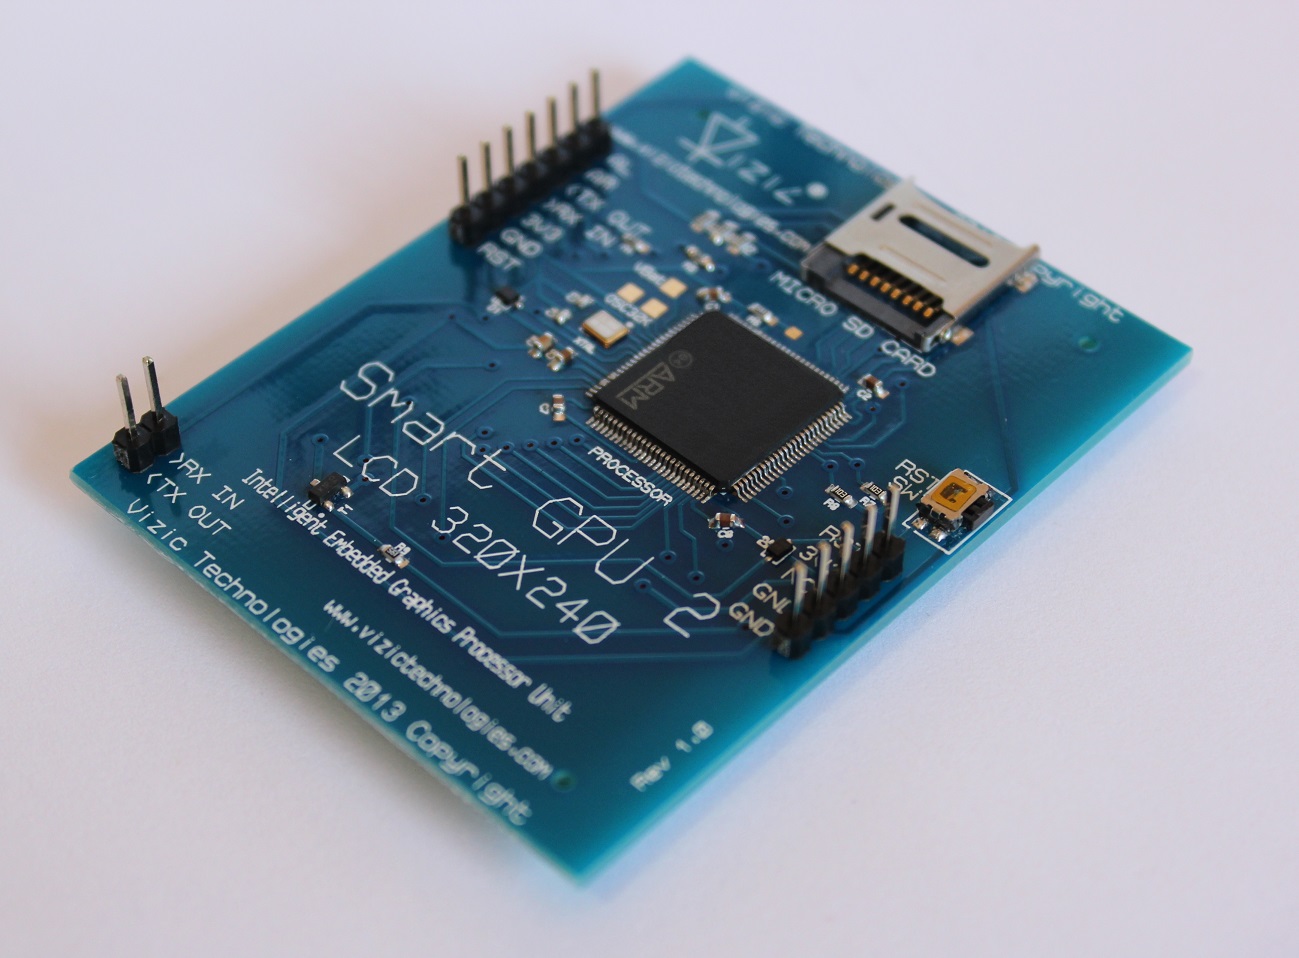
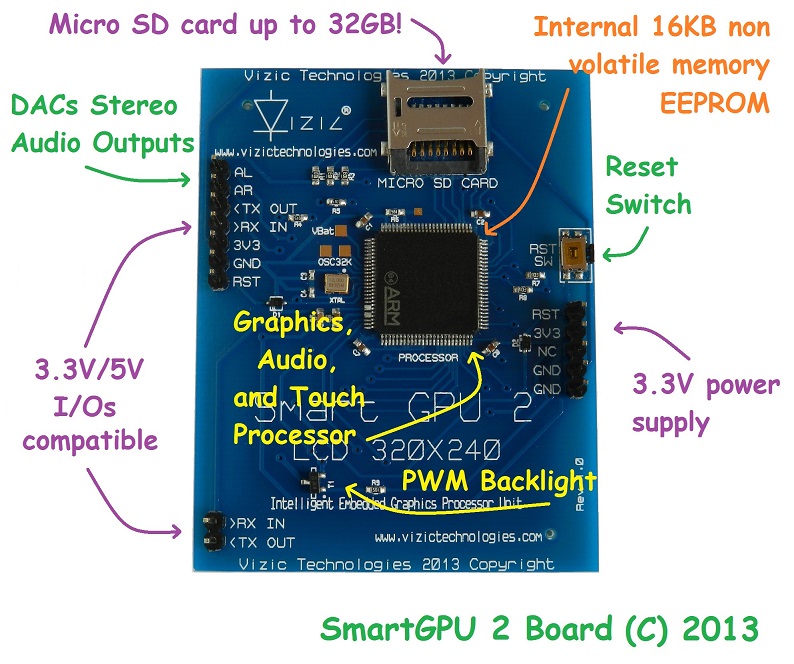
SmartGPU 2 explained
SmartGPU 2 mounted on Arduino

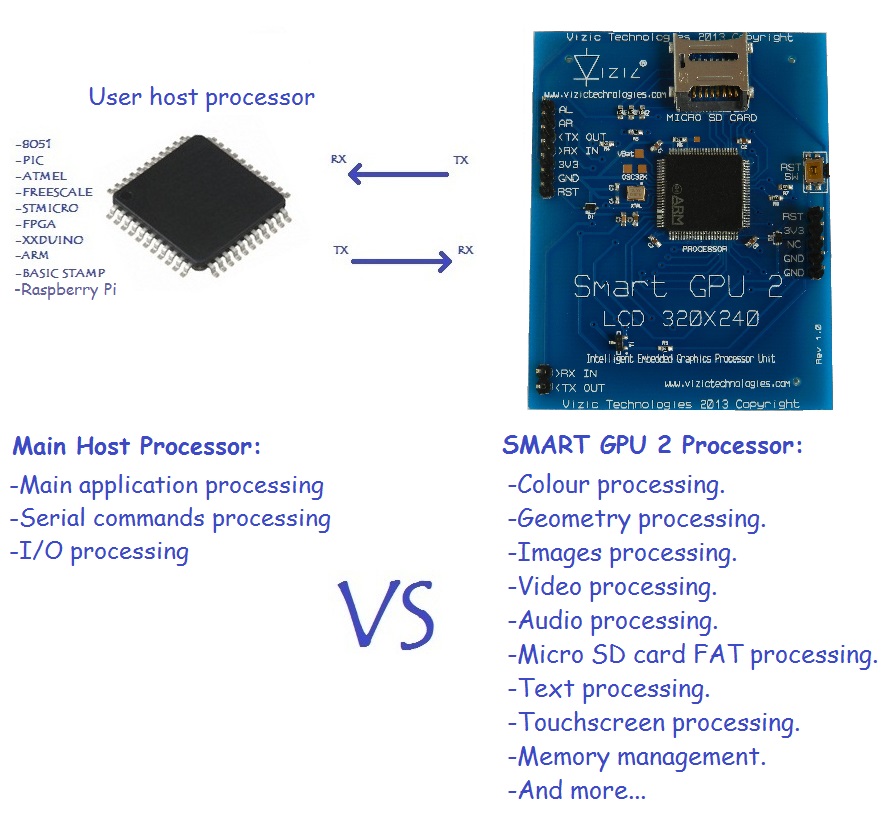
SmartGPU 2 doesn’t need any configuration or programming on itself, it’s a slave device that only receives orders, reducing and facilitating dramatically the code size, complexity and processing load on your favorite main processor.
#include <SMARTGPU2.h>
in your main sketch and create the object:
SMARTGPU2 lcd; //Create the object
#include <SMARTGPU2.h>     //include the SMARTGPU2 library!

SMARTGPU2 lcd;             //create our object called LCD

char message[]="Hello World";

void setup() { //initial setup
  //Those two functions must always be called for SMARTGPU2 support
  lcd.init();  //configure the serial and pinout of arduino board for SMARTGPU2 support
  lcd.start(); //initialize the SMARTGPU2 processor
}

void loop() { //main loop
  lcd.erase();                                         //erase screen
  lcd.putPixel(300,200,CYAN);                          //draw a pixel
  lcd.drawLine(50,50,150,200,WHITE);                   //draw a line
  lcd.drawRectangle(10,10,200,180,RED,UNFILL);         //draw a rectangle
  lcd.drawCircle(160,120,50,GREEN,UNFILL);             //draw a circle
  lcd.drawTriangle(15,15,200,210,180,70,BLUE,UNFILL);  //draw a triangle
  lcd.putLetter(100,100,MAGENTA,FONT3,TRANS,'E');      //write a single letter 'E'
  lcd.imageSD(0,0,"hydra320");                         //Open image "hydra320.bmp" stored on the microSD card
  lcd.string(10,10,300,220,YELLOW,FONT3,TRANS,"String test for SMARTGPU");  //write a string on the screen
  lcd.stringSD(5,50,300,230,MAGENTA,FONT3,TRANS,BEGINNING,ALLCONTENTS,"text1");  //call the text file "text1.txt" previously stored on the micro SD card
}
Here are some videos of SmartGPU 2 + Arduino:
Arduino Smartphone - SmartGPU 1
All the Source Code of those videos, and many other examples could be downloaded from HERE.


