Arduino Playground is read-only starting December 31st, 2018. For more info please look at this Forum Post

SMARTWAV - Intelligent Embedded Stereo Audio Processor Unit

Presentation:

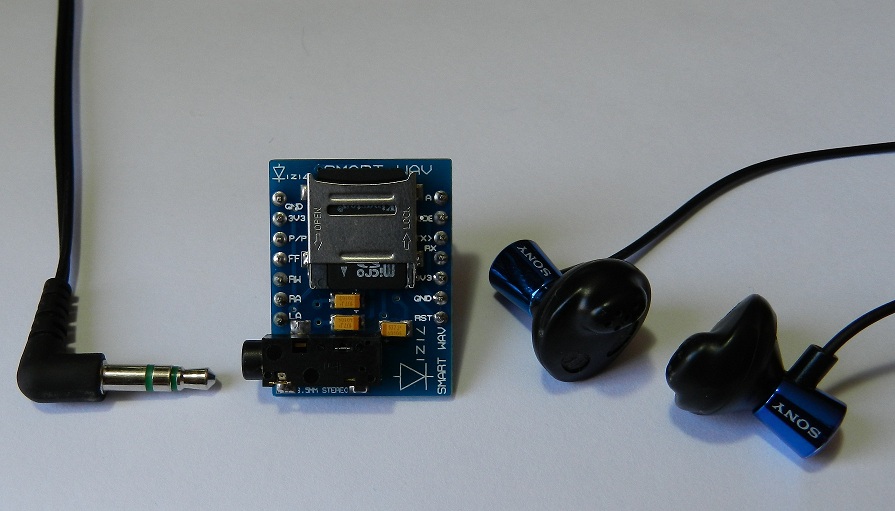
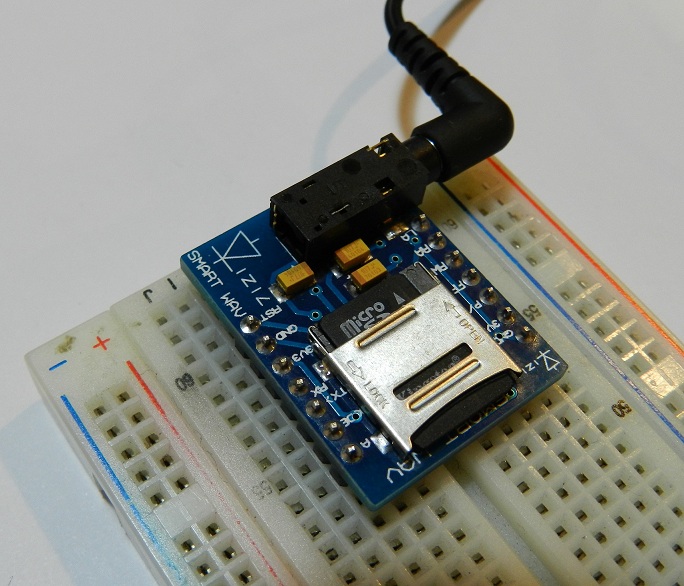
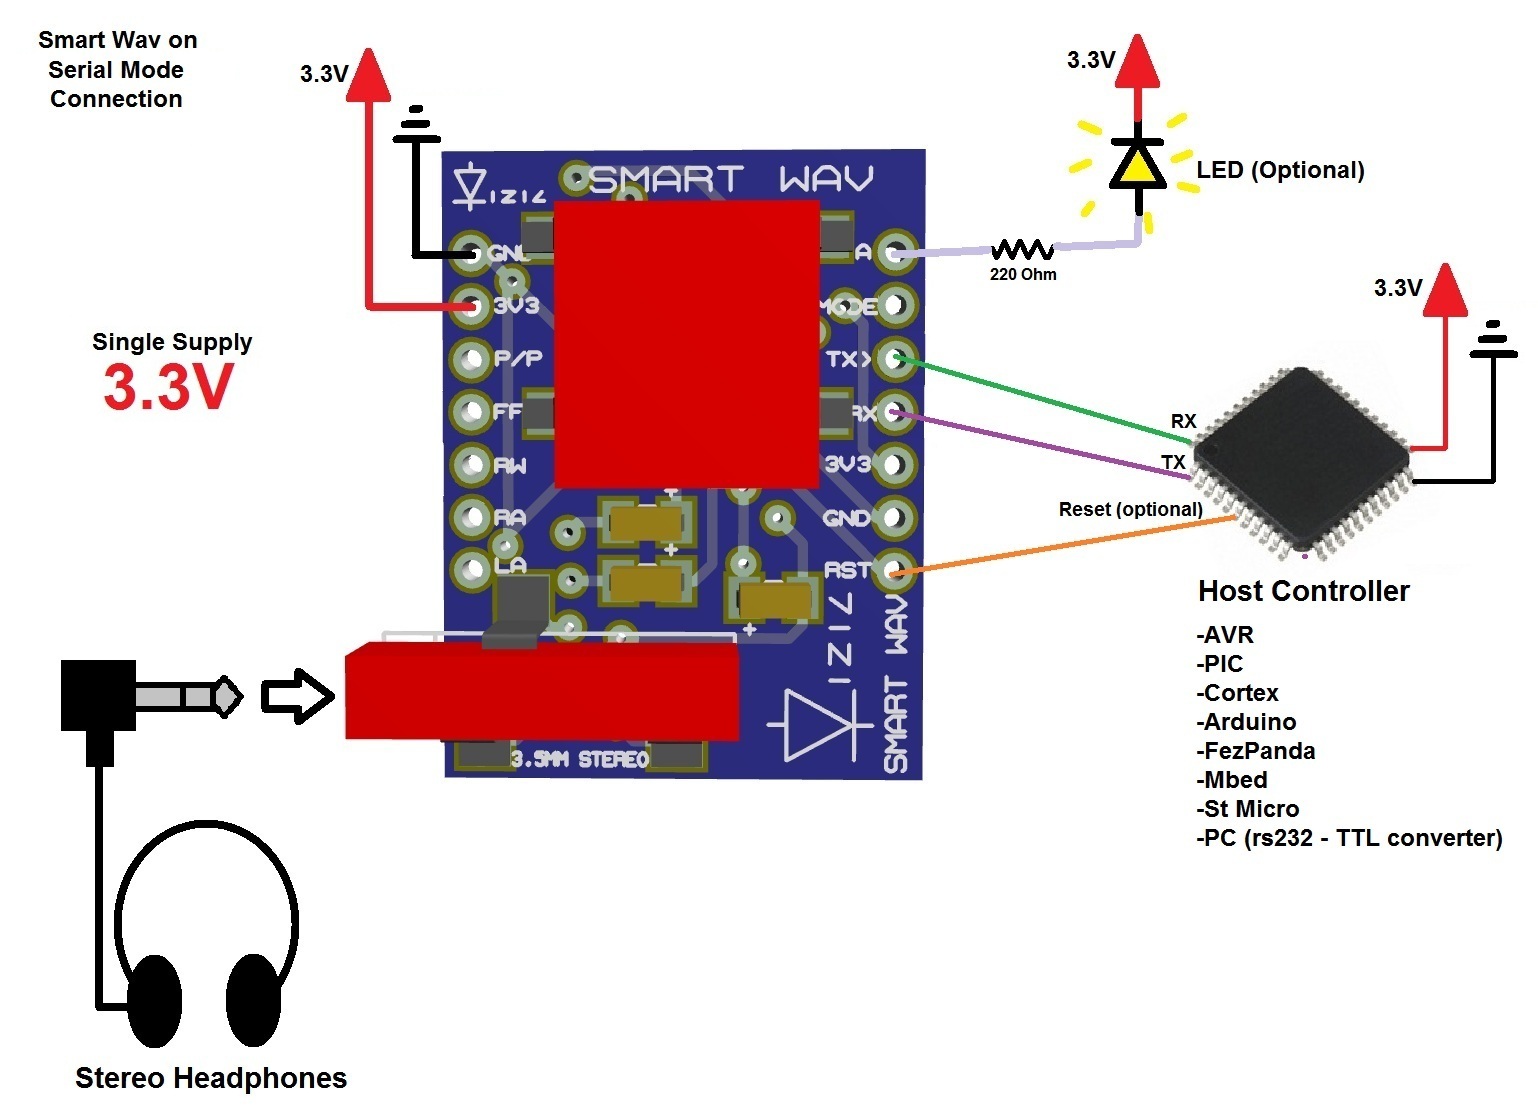
This page presents a library to use a SMARTWAV intelligent embedded audio processor from Vizic Technologies: the easiest way to add High Quality Stereo Sound to any project: http://www.vizictechnologies.com/#!smartwav/c118s

The Audio module features are:

  • Pre-Amplified Dual channel Stereo Out with 8/16bit, stereo/mono, and up to 48khz sampling rate, CD quality.
  • Integrated Digital Volume Control with 255 steps.
  • Long file names and folder management support.
  • Serial mode or Stand-alone mode.
  • On board stereo 3.5mm plug for headphones, or line out.
  • Play speed control: 0.5X, 1X, 1.5X and 2X. (Fast Forward).
  • Easy 5 pin interface to any host device: VCC, TX, RX, GND, RESET.
  • On-board uSD/uSDHC memory card socket with FAT (windows PC), Support up to 32GB for storing thousands of songs/audio WAVE files. No need of special/rare file format.
  • Sleep mode.
  • Active out pin for led indicator.
  • Input pin for mode selection: VCC-serial, GND-stand-alone.
  • 9600 standard Baud Rate speed, 8 bits, no parity, 1 stop bit.
  • 5V and 3V3 I/O compatible.
  • 3V3 power supply, ultra-low current consumption.
  • Compatible with any microcontroller (8051, pic, AVR, ARM, mbed, FPGAs, Arduino, PC) and development boards with a UART.

Notes for example code below: See the SMARTWAV.h file for the Arduino three Arduino pins to use. The pins can be altered. ITunes works very well for converting mp3 files to wav files that will actually run on SMARTWAV.
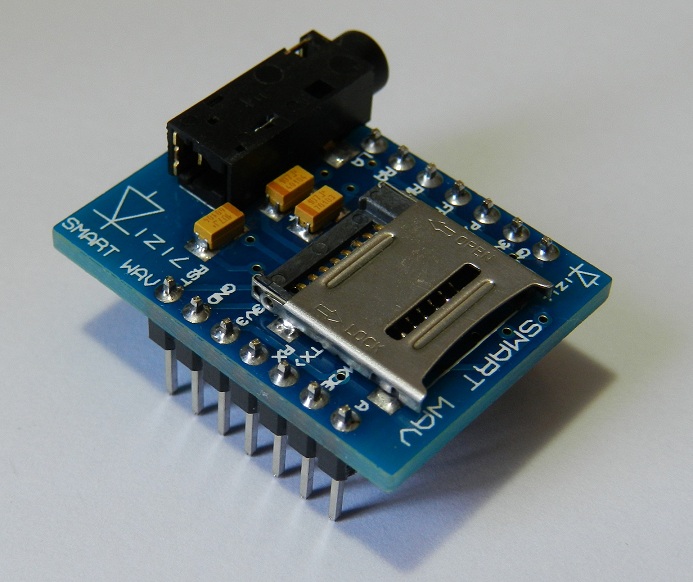
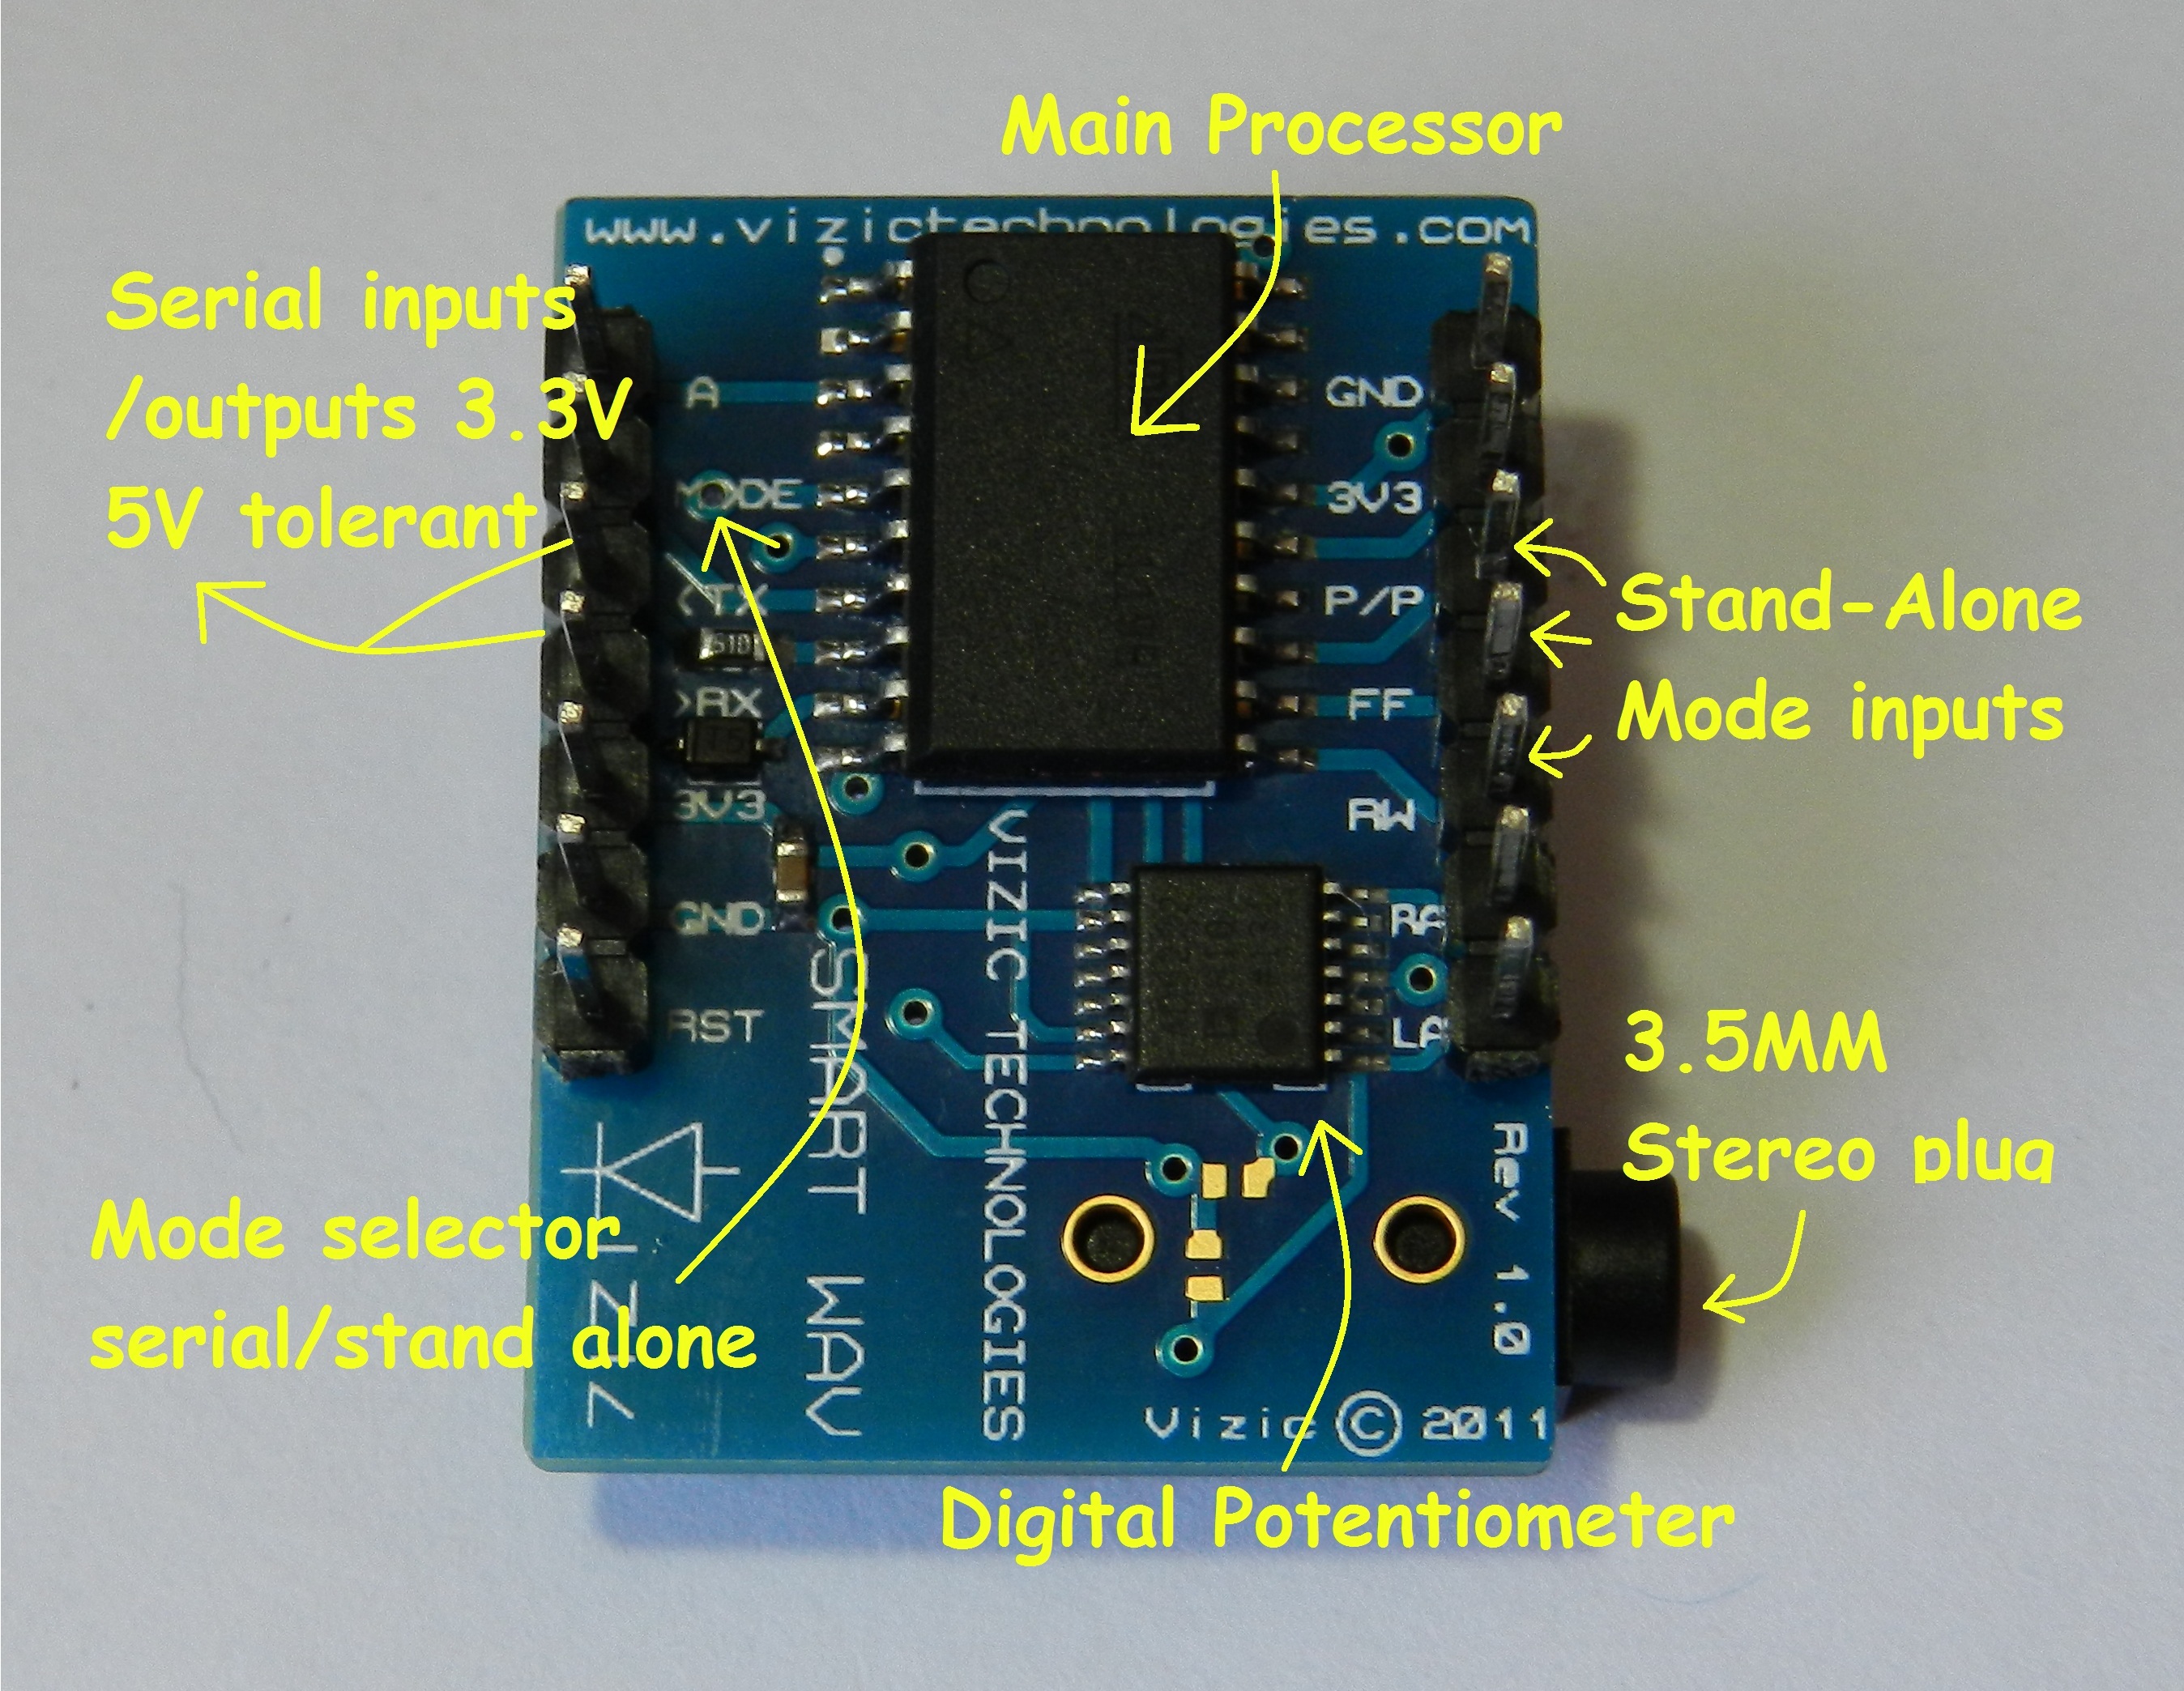
SMARTWAV Images:

SMARTWAV explained

Connecting the SMARTWAV:

  • You will need to power the Audio module with 3.3V.
  • I/O pins are 3.3V I/O and 5V tolerant for serial communication.
  • If you use an external power source, make sure the Arduino ground and external power ground are linked otherwise the serial commands will not be received correctly by the screen.
  • Use one pin for reseting the module(optional).

SmartWAV Typical connections...

-Serial Mode:

-Stand-Alone Mode(no controller needed):

SMARTWAV Arduino Library:

  • You can download the SMARTWAV Arduino Library here.

  • Unzip the file, place in your Arduino libraries folder, re-start the Arduino IDE, now you're ready to enjoy.

Just insert the

#include <SMARTWAV.h> //Create our object

in your main sketch and create the object: SMARTWAV sWav; //Create the object

Example Code:

//main
#include <SMARTWAV.h>  //include the SMARTWAV library!

SMARTWAV sWav;         //create our object called sWAV (smartWAV)

void setup() {     //initial setup
  //Those two functions must always be called for SMARTWAV support
  sWav.init();     //configure the serial and pinout of arduino board for SMARTWAV support
  sWav.reset();    //perform an initial reset  
}

void loop() {             //main loop
 char playList[50];       //array that stores all the microSD card audio files 
 char folders[50];        //array that stores all the microSD card folders/Dirs 
 char songName[10];       //array that stores the audio file name

 while(1){                          //loop forever
  sWav.playTracks();                //Play any audio track stored on the microSD card root path
  delay(2000);                      //let it play some seconds                             
  sWav.pausePlay();                 //Pause track 
  delay(2000);                      //let it play some seconds
  sWav.pausePlay();                 //resume track 
  delay(2000);                      //let it play some seconds
  sWav.rewindTrack();               //rewind track
  delay(2000);                      //let it play some seconds
  sWav.nextTrack();                 //jump to next track
  delay(2000);                      //let it play some seconds
  sWav.stopTrack();                 //stop playing track
  sWav.playTrackName("lovers");     //play track named "Lovers" stored on the microSD card
  wait(20000);                      //let it play some seconds
  sWav.getFileName(name);           //get current playing song name
  sWav.stopTrack();                 //stop track
  sWav.getFolderList(folders);      //get folder list on microSD card
  sWav.getFileList(playList);       //get audio files/song list on microSD card  
  sWav.setFolder("Rock");           //enter "Rock" folder
  sWav.playTracks();                //Play any audio track stored on the microSD card 0:/Rock/ path
  sWav.playSpeed(TWOX);             //set play speed to 2X 
  sWav.continuousPlay(ENABLE);      //enable continuous play
 }
}

Videos:

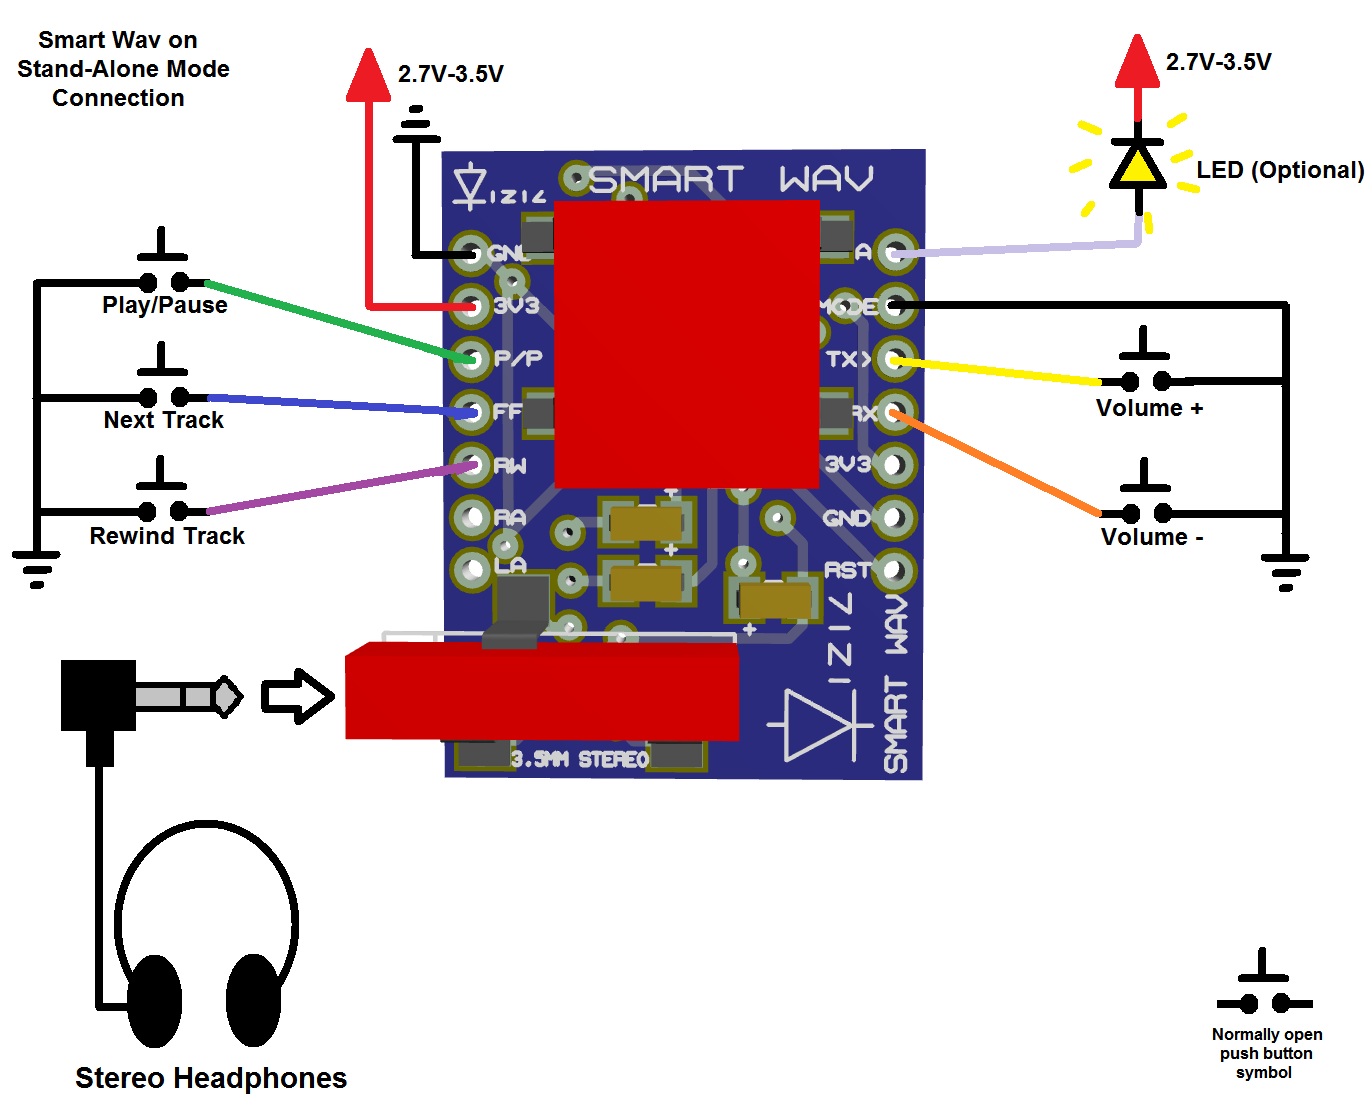
SMARTWAV as Audio Player - (Stand-Alone Mode)

More soon will be uploaded...

Demos & Source Code:

All the Source Code of those videos, and many other examples could be downloaded from HERE.

Notes:

  • Examples could be downloaded here.
  • Feel free to use the library!

SMARTWAV board:

  • The SMARTGPU board could be obtained from HERE.